
How to Make a Tool Roll


https://www.youtube.com/watch?v=VY5mRRkyQu8
Whether it is carving chisels, files, screwdrivers, or wrenches, a tool roll is a great way to store them for quick use and clean storage. For any hand tool woodworker, this is something that has come across your mind. The plain fact is this leatherworking project is a simple and easy way to store your woodworking tools.
Supplies and tools
Leather: http://amzn.to/2jtgIZr
Waxed Thread: http://amzn.to/2knzobQ
Rivets: http://amzn.to/2jVgWXS
Tools Needed
1/8" Hole Punch: http://amzn.to/2jtgEc9
Threading Punch: http://amzn.to/2kwGGNJ
Leather Stitching Needles: http://amzn.to/2jiXr9R
Carving chisel set: http://amzn.to/2jtkCS4
Smooth face Hammer: http://amzn.to/2kwSETr
Straight edge: http://amzn.to/2j8dg8l
Square: http://amzn.to/2j86U8N
Spring clamp: http://amzn.to/2jtwP9r
Cut Leather
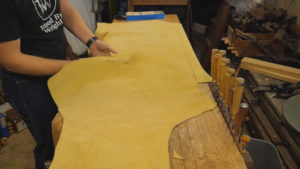

The side I got was large enough for this tool roll, an apron, all the leather on my vises, and several strops. I start by drawing a large rectangle 23" by however long you want it to be. Mine is 47" long. Most are between 25" and 30" but I want to hold a lot. Next, I fold over either long edge to create a 5" flap on either side. With a square draw a line every 2 1/2". Keep the line 1/2" from the bottom and top. (Size may need to change depending on the tools you want to store). This will be the line you sew the pockets on. The stitching will cover the line so it is not a problem. When drawing the lines on the other side be careful to keep the lines from lining up with the lines on the other side. This way when the chisels are inside the tips will not line up.
Punch Holes


At the tip of each line, you need to punch a 1/8" hole. This is where the rivet will go. From there down you will want to use a stitching punch. This will put a hole every 1/4" that the thread can pass through. I like to keep the last hole 3/8-1/2" away from the bottom. Repeat this for every line. On mine, this ended up being 4o lines to punch.
Stitch the Leather


The stitching is simple once you do a line or two. I start by coming up through the rivet hole. Then I use a spring clamp to hold the end of the thread under the rivet hole. With this method, there is no need for knots. Then, continue up and down through every other hole. At the bottom, continue in and out back up the line this will allow you to put a stitch in between the ones you just made. When you reach the top you should end by going back through the rivet hole.
Secure With a Rivet


With the two ends of the thread sticking through the rivet hole, I pull them tight and insert the male end of the rivet up through the rivet hole. I place it on a backer board and, then, put a cap on the other side of the rivet. Once more, I make sure the thread is pulled tight and under the cap of the rivet. Then a couple of good smacks with a smooth face hammer will secure the rivet in place. The extra thread hanging out can be cut and you can go onto the next line.
Make the Strap

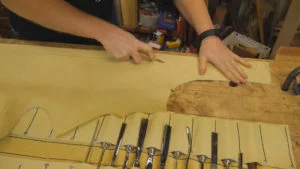
At this point, you can test the chisels. The last thing that needs to be added is a strap to hold the roll tight. I cut mine about 30" long by 1 1/2" wide with one end rounded. You could also just use a belt. I just wanted it to be made out of the same leather as the roll.
Secure and Finish


I secured my strap with 4 rivets. This was done by punching 4-1/8" holes and securing rivets just like I did at the end of each stitch. Lastly, I used my brand at the end of the strap to give it a bit of flair. Now you can put in all your chisels, roll it up and wrap the strap around the roll and tuck it back into itself.