
How to Make a Router Plane
https://www.youtube.com/watch?v=CIp6Sdcugx8
A router plane is an easy tool to make, and it was one of the first that I made. In this video, I go over how to make a router plane out of some scrap cherry and some eye bolts. This is a quick hand tool woodworking project that most anyone can do, and the results can change a shop! With little more than a brace, bit and chisel you can make one too.
I will not go into what it is for or how to use it other than to say it is an extremely useful tool even in a power tool shop. Here is a video on how to use it.
https://www.youtube.com/edit?o=U&video_id=2HocH6JHNLs
Tools Needed
Brace: http://amzn.to/2hPEs9Y
Bit Set: http://amzn.to/2hZVT5T
Coping Saw: http://amzn.to/2kCe68X
Panel Saw: http://amzn.to/2hjAura
Chisel Set: http://amzn.to/2i26mzX
Block Plane: http://amzn.to/2ikkaqg
File Set: http://amzn.to/2l0czdB
Rasp Set: http://amzn.to/2kWtnDw
F-Clamp http://amzn.to/2nrdEzs
Hacksaw: http://amzn.to/2oELEtK
V-Tool: http://amzn.to/2kf8OjO
Supplies needed
Scrap wood: Whatever size you want
Boiled Linseed Oil: http://amzn.to/2hPEUVO
Paste Wax: http://amzn.to/2inlN23
Wood Glue: http://amzn.to/2kEeTHc
Router Plane Iron - bit.ly/2nZuS5ebit.l You can make one too!
Eye Bolts - http://amzn.to/2p35JWP
Lay-Out Design


This is the part where you can be creative and make it whatever you want. All it needs is a larger flat surface, a hole to see the cutter working, and a small chunk at the back to attach the cutter head.
For mine, I used a template I found that was about the size I wanted. About 7" x 5," but in the past I have need smaller ones and larger ones.
You can also find ornate stencils and designs online that you can copy but it does not have to be fancy.
For the viewing hole, I draw 4 circles in each corner, then draw a couple notch outs for finger grips.
Cut Out the Shape


I use a bit and brace to drill out all the holes and notches. I start by boring from one side tell the screw comes out than bore from the other side to leave a nice clean hole.
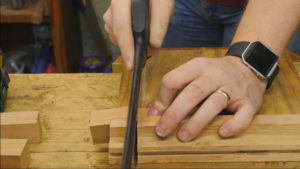
In between the holes of the viewing hole, I use a coping saw to remove the majority of the waste, then come back to the line with a chisel and give it a nice clean line between the holes.
Make Cutter Support


The back on mine is 1" x 1" and I want it to be about 2" tall to give the cutting iron more support.
To do this, I rip down a strip of cherry 1" square then cut it to about 2" long.
Then with a bit of wood glue, I attach it to the back of the router body and clamp it.
Once it comes out of the clamp, you can use a plane to flush up the block and make it look nice!
Shape the Body


At this point, most of the work left is just for looks; so it could be skipped, but who would want to do that. I want to round over all the corners and smooth out the grips to feel a bit better.
I start with a very coarse rasp to get the rough shape. Then, I use a series of finer and finer files to remove the marks. And for a final touch, I use a bow saw that is great for getting into the corners and curves. Here is a video on making one of those.
https://www.youtube.com/edit?o=U&video_id=AUJ-JnGp-Rs
Final Detail and Carving


For me, a hand tool is not done until there is a bit of carving on it. It is too easy to over do it, so on this one I chose to just outline the edge with a light v-groove.
I use a carving v-tool and just follow a line I drew with a pencil. Also for the top, I put in my double "W" logo just for fun! Here is where you can have some fun!
Install Cutter Mount


For this one, I decide to use eye bolts to pull the cutter back against the rest. I start by drilling 2 1/4" holed through the backrest. I make sure to keep them in line and one directly above the other.
Next, I need the heads of the eye bolts to recess into the back just a bit so that they can hold the cutter flat on the backrest.
You may need to change this back to fit your cutter. For this one bit.ly/2nZuS5ebit.l it needs a flat back. But if you get one from Veritas, you will want a v-groove in the back. You can also make one to fit your style. I made my first ones out of old chisels you can see here. https://www.youtube.com/edit?o=U&video_id=cJZhPc7r7bM
Finish It

For a finish, I use boiled linseed oil and paste wax. It just feels perfectly on the hand and it my choice for all hand tools. Here is more detail on the subject. https://www.youtube.com/edit?o=U&video_id=KvSvmOwmNV8
After that, you just need to install the cutter and take it for a spin.