
How to Make a Layout Square with Maple and Walnut
The layout square is the predecessor to the carpenter's square as we know it today and this simple design goes back pre-history. They are found in every culture and time. Almost all are built the same way just different decorations and sizes to match the culture and use. We decided to make this out of maple and walnut as it is a bit cliche, but still a strong contrast! This can be built in a long afternoon, and if treated well, can last the rest of your life. It is also a fantastic learning exercise as you get to play with two different joints and a few simple angles. Then, you can do whatever you want to the finished look.
Tools Needed
#4 Hand plane setup for smoothing: http://amzn.to/2hc6LQZ
Square: http://amzn.to/2ia9M3Z
Marking Gauge: http://amzn.to/2i0jvHx
Panel Saw: http://amzn.to/2hjAura
Marking Knife: http://amzn.to/2hPHf34
Brace: http://amzn.to/2hPEs9Y
Bit Set: http://amzn.to/2hZVT5T
Chisel Set: http://amzn.to/2i26mzX
Flush Cut Saw: http://amzn.to/2jI0z05
File Set: http://amzn.to/2l0czdB
V-Tool: http://amzn.to/2kf8OjO
Router Plane http://amzn.to/2nba2Qc
F-Clamp http://amzn.to/2nrdEzs
Supplies Needed
2 Maple beams 2 1/4" x 3/4" x 22"
1 Walnut Cross Member 2 1/4" x 3/4" x 22"
3/16" Oak Dowel: http://amzn.to/2kEj1GV
Wood Glue: http://amzn.to/2kEeTHc
Boiled Linseed Oil: http://amzn.to/2hPEUVO
Paste Wax: http://amzn.to/2inlN23
Dimension Lumber

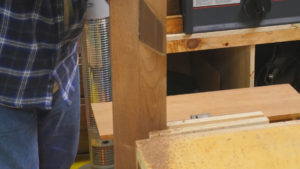
If you are working with rough sawn lumber, you will want to dimension the lumber. This is done by flattening one side then squaring one edge to that side then bringing the other edge and face to the appropriate dimension. I have a full video on this step with a lot more detail, https://www.youtube.com/watch?v=s9O0tXjKU9Y, but most people will skip this step as they either have pre-dimensioned the lumber or buy it that way.
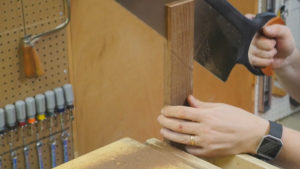
Cut Bridal Joint


The bridal joint is a simple joint. It is much like a mortise and tenon, but it is only captured on 3 of the 4 sides of the tenon. This is the joint that holds the main corner of the square. There is far more here to go into than one step can handle so I have a full video on this joint. https://www.youtube.com/watch?v=hMEFLcgQ2JE With a simple hand saw and chisel these can be made quickly!
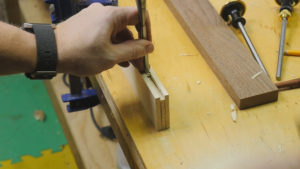
Cut Half Lap Joint


The half lap joint is very similar to cutting a bridal joint, but you are only cutting one-half of the tenon on either joint. With the beams in place, square set the cross member on top of the beams and trace it out with the making knife both where it intersects the beams and the cross member. Then, just like with the tenon, cut down on the shoulder and the cheek. For the main beam, it is easier to cut the cheek with a chisel and router plane than with a saw. Do not let the angle complicate this in your mind, it is still cutting straight lines to depth, just the wood is turned 45 degrees.
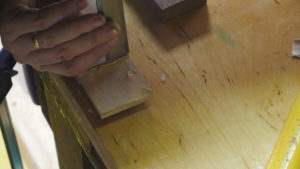
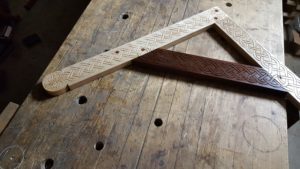
Shape Beam


Here you can get creative. I wanted mine to look a little Celtic; so I drew a circle on the end of each beam with a cup that was in the shop. Some like to do other decorative designs here. This is where you can have fun as they really do not matter. I used a chisel to take it down close to the line, but you could as easily use a coping saw or turning saw. After cutting it out, you can use a file to smooth out the shape. Lastly, use the first beam to transfer the design to the second beam.
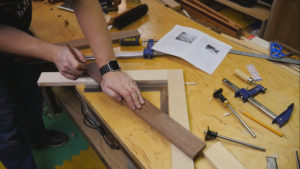
Glue Frame


For gluing the frame, I use F-Clamps to hold the joints. Also, at this point, I want to make sure it is close to square so I use a square to check before clamping it tight. Then, let it set before going further.
Pin Joints


I like to add pins to the joints, more for look, than function. I just drilled 2-3/16" holes per joint. Then, cut some oak dowel to fit the holes. With a little bit of glue, they will not come loose.
Trim Off


Using a flush cut saw, you can cut off the dowels and the ears from the cross member. Then, I use a smoothing plane, to smooth out all faces and edges.
Square the Square


This is the critical point where we turn it into an actual square. If you have a square you trust, you can use that to make the adjustments, but if not, you can use a board with a straight edge. By drawing a line with the square then flipping it over and drawing the same line at 90 degrees to the straight edge, you can see where material needs to be removed. You can use a smoothing plane to bring it into square so that when you draw the two lines they line up perfectly with each other.
Carving and Finish


For my hand tools, I like to add some carving. This is a lot easier than it looks and a lot of fun. With a V- tool it can be done quickly. You can see more about it here. https://www.youtube.com/playlist?list=PLAbayqjimalG3gI_nmk2H55P2S_L5lTvl
For a finish, I use boiled linseed oil and paste wax. It is a simple finish and feels great in the hand. Here is a full video on my finishing method. https://www.youtube.com/edit?o=U&video_id=KvSvmOwmNV8