
How to Learn Small Sculptural Carving
https://www.youtube.com/watch?v=I-U-AMbS-cE
Every year, I try to stretch myself in my woodworking skills to make something new for my wife for Valentine's day. This year, I decided to dabble in sculptural carving.
Tools Needed
Carving Chisel Set: http://amzn.to/2kf8Wjb
Dovetail Saw: http://www.highlandwoodworking.com/veritas-dovetail-saw.aspx?A=1367&B=28
Bench Chisel Set: http://amzn.to/2i26mzX
Long-nosed Marker: http://amzn.to/2lExV1e
Coping Saw: http://amzn.to/2kCe68X
Carving Knife: http://amzn.to/2kNqwvI
Supplies Needed
Basswood used: http://amzn.to/2kBypUe
Boiled Linseed Oil: http://amzn.to/2hPEUVO
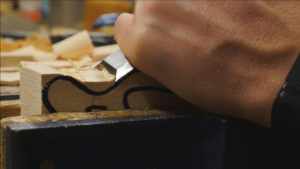
Draw Out Pattern

I found a picture of what I wanted to try to make online and printed it out. Next, I freehand drew out what I wanted with a pencil until I got the shape the way I wanted it. Then, I finalized the shape with a sharpie.
Remove Most of The Waste


I start with a saw to cut in curfs at the low and high points along the sculpture. These are stop cuts so the majority of the wood can be removed with a large chisel. I come in with the bevel of the chisel down and slowly remove large portions wood until I get close to the line. Always keep in mind the grain direction so you do not take off more than you want to.
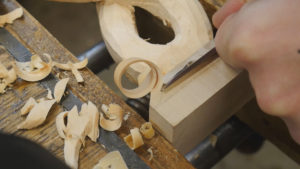
Remove Waste On Faces

Next, I repeat this on the front and back. On this side, I used a large gauge to quickly bring it down close to the shape in my mind. Do not worry about perfection; just have fun and be willing to learn and try new things.
Shape the Main Body


At this point, it is all about experimenting. Try different chisels and see if they give you what you are looking for. Always remember to make a stop cut and the remove the waste down to that stop cut. A bent neck is great for getting down into spaces that are hard to reach. Also at this point, the grain direction becomes very important. Cut across the grain, not into it. Just slowly chip away at it until you get close to what you like.
Shape Base
For the base, I could have done something fancy but I decided to keep it simple with a heavy smooth chamfer. Just using a straight chisel works fantastically on this basswood. Feel free to experiment. Remember, your wife will love it because you spent the time to make it for her, not because it is perfect.
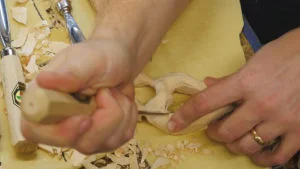
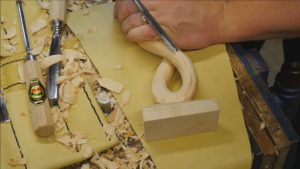
Work on the Delicate Parts

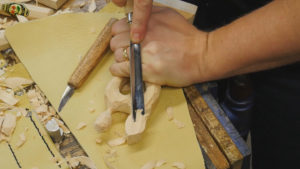


For the heads, they were too delicate to use a chisel to remove the waste between them. For this, I found a coping saw was perfect. Then, it is more of the same. Use a gouge to remove the majority of the material, then, flip it over bevel up and use it to round the surfaces. For the space between the two bodies, I found a carving knife to make quick work of it. Again do not be afraid to try something new and experiment.
Final Surface

Initially, I was going to give it a smooth surface and sand it, but I decided to leave it fairly rough. I like the aesthetic of the chipped surface. If you do decide to sand make sure it is the last thing to touch the wood. Any embedded sand will dull the tools. I also decided to use the V-tool to put in a grove on the front of both bodies. It was a last minute idea that I am glad I added.
FINISH IT!


For a finish, I just used Boiled linseed oil. The basswood soaked it up fast and I ended up putting on 4 coats with about 15 minutes between until the wood stopped soaking it up. I let it sit overnight, and sure enough, she likes it! Be willing to have fun and try new things; you might be surprised!