
Making Interlocking Coasters
I was asked by a friend to make coasters sometime ago on the channel and figured this would be a good opportunity. I don't like making coasters that have to go into a little box as the box itself serves little point other than holding the coasters and that seems counterproductive. I wanted to make some coasters that would hold themselves together but still look like just a stack of coasters. The idea of using interlocking pins came to mind and the idea for these coasters was born. Originally, I was asked to make them out of walnut and maple but as that combination is a little overused and I much prefer using white oak, I decided to make them out of walnut and white oak.
Link to plans
Link to build video
Tools needed
#4 Hand plane: http://amzn.to/2hc6LQZ
Hand saw: https://amzn.to/2I2gvWW
Brace: http://amzn.to/2hPEs9Y
Bit Set: http://amzn.to/2hZVT5T
Beam Clamps: https://www.youtube.com/watch?v=hKbOO4hLri8
Flush Cut Saw: http://amzn.to/2jI0z05
Frame Saw: http://www.blackburntools.com/new-tools/new-saws-and-related/roubo-frame-saw-kit/index.html
Supplies needed
White Oak: https://amzn.to/2pA8Qbu
Walnut: https://amzn.to/2G2hPZ1
Walnut Dowel: https://amzn.to/2pDQFR8
Titebond 3: https://amzn.to/2pAK0Hu
2p 10 thin: https://amzn.to/2pzTaF0
Wipe on Poly: https://amzn.to/2Gfqo6l
Boiled Linseed Oil: http://amzn.to/2hPEUVO


Step 1. Cut boards to size.
I chose to make my coasters about 4 in square, and I wanted to make 6 coasters. This means my boards need to be at least 12 in long. I chose to cut them at 16 in long so that I would have plenty of extra to work with. Next, I wanted the strip of white oak in the middle to be a half inch wide so I ripped down the stock of white oak to 1/2 in. This would give me a large strip of walnut a thin strip of white oak and then another large strip of walnut.
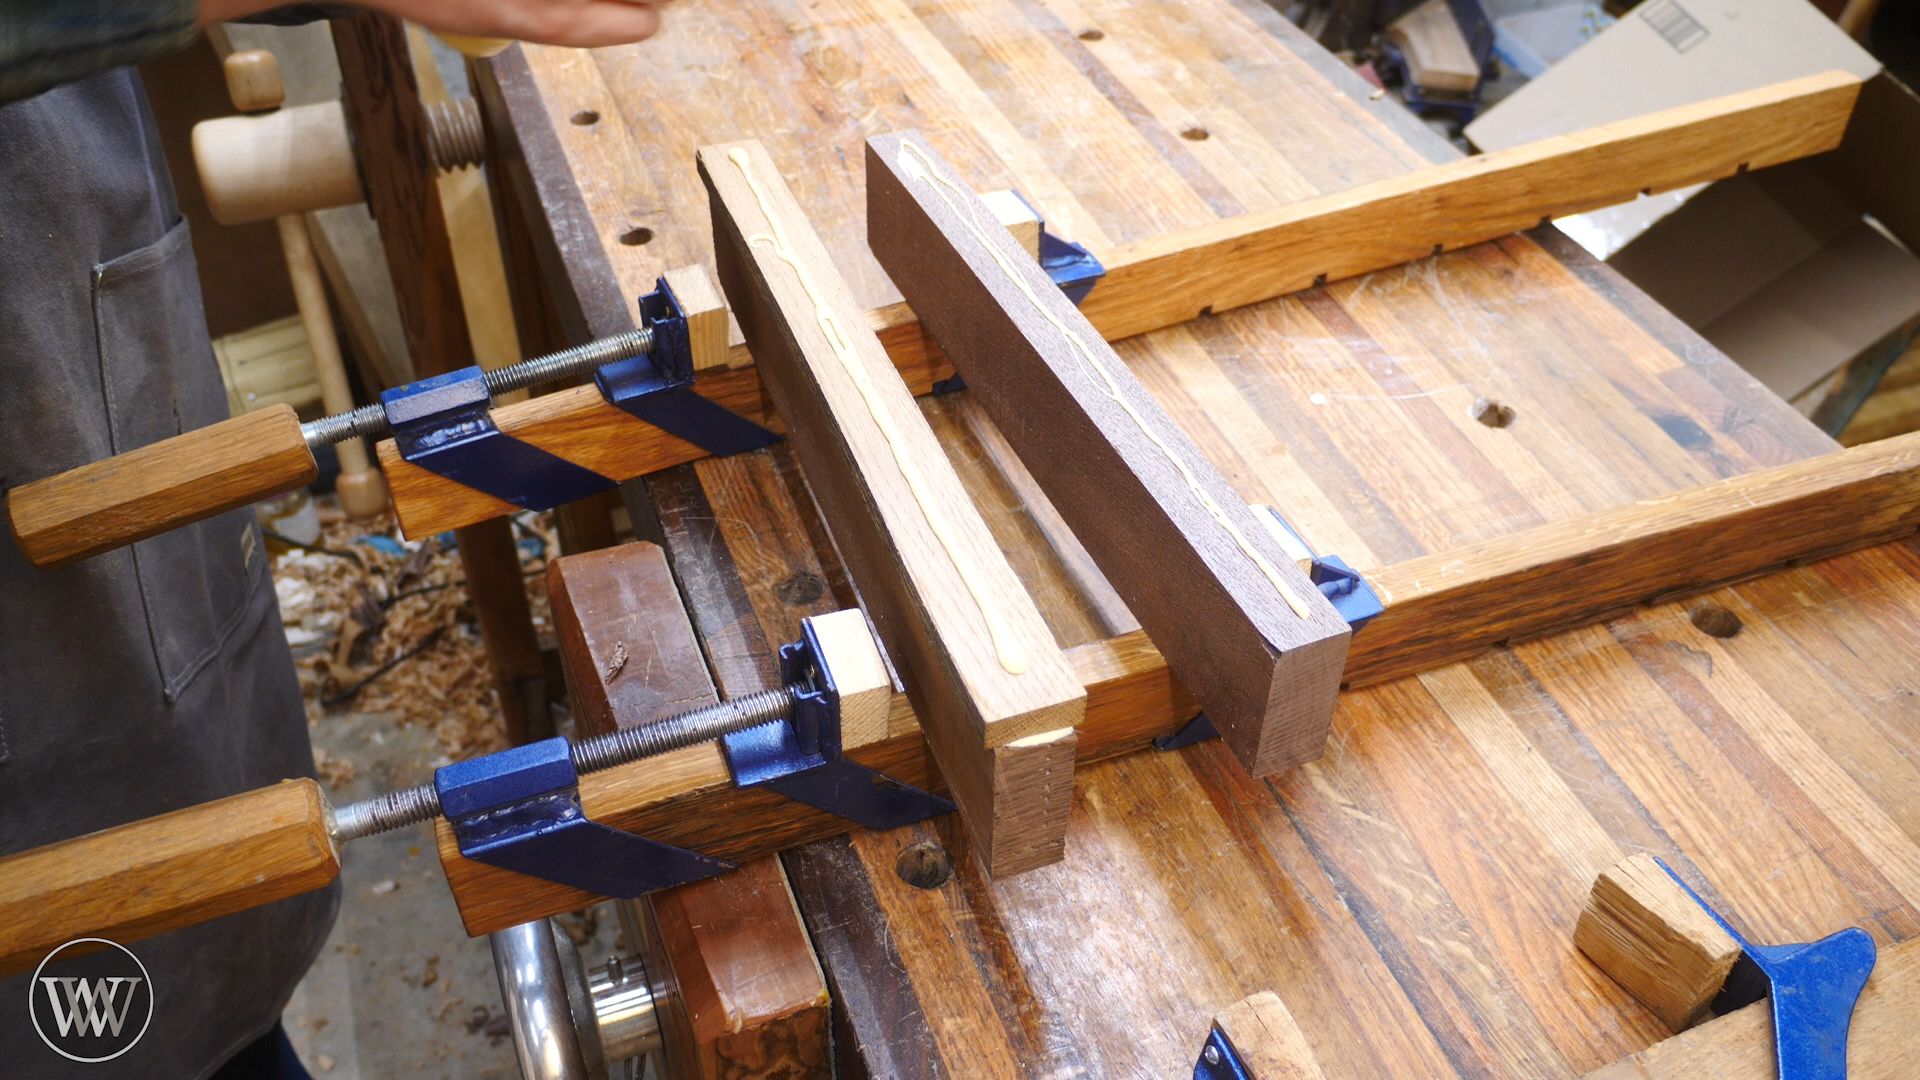
Step 2. Join and glue boards
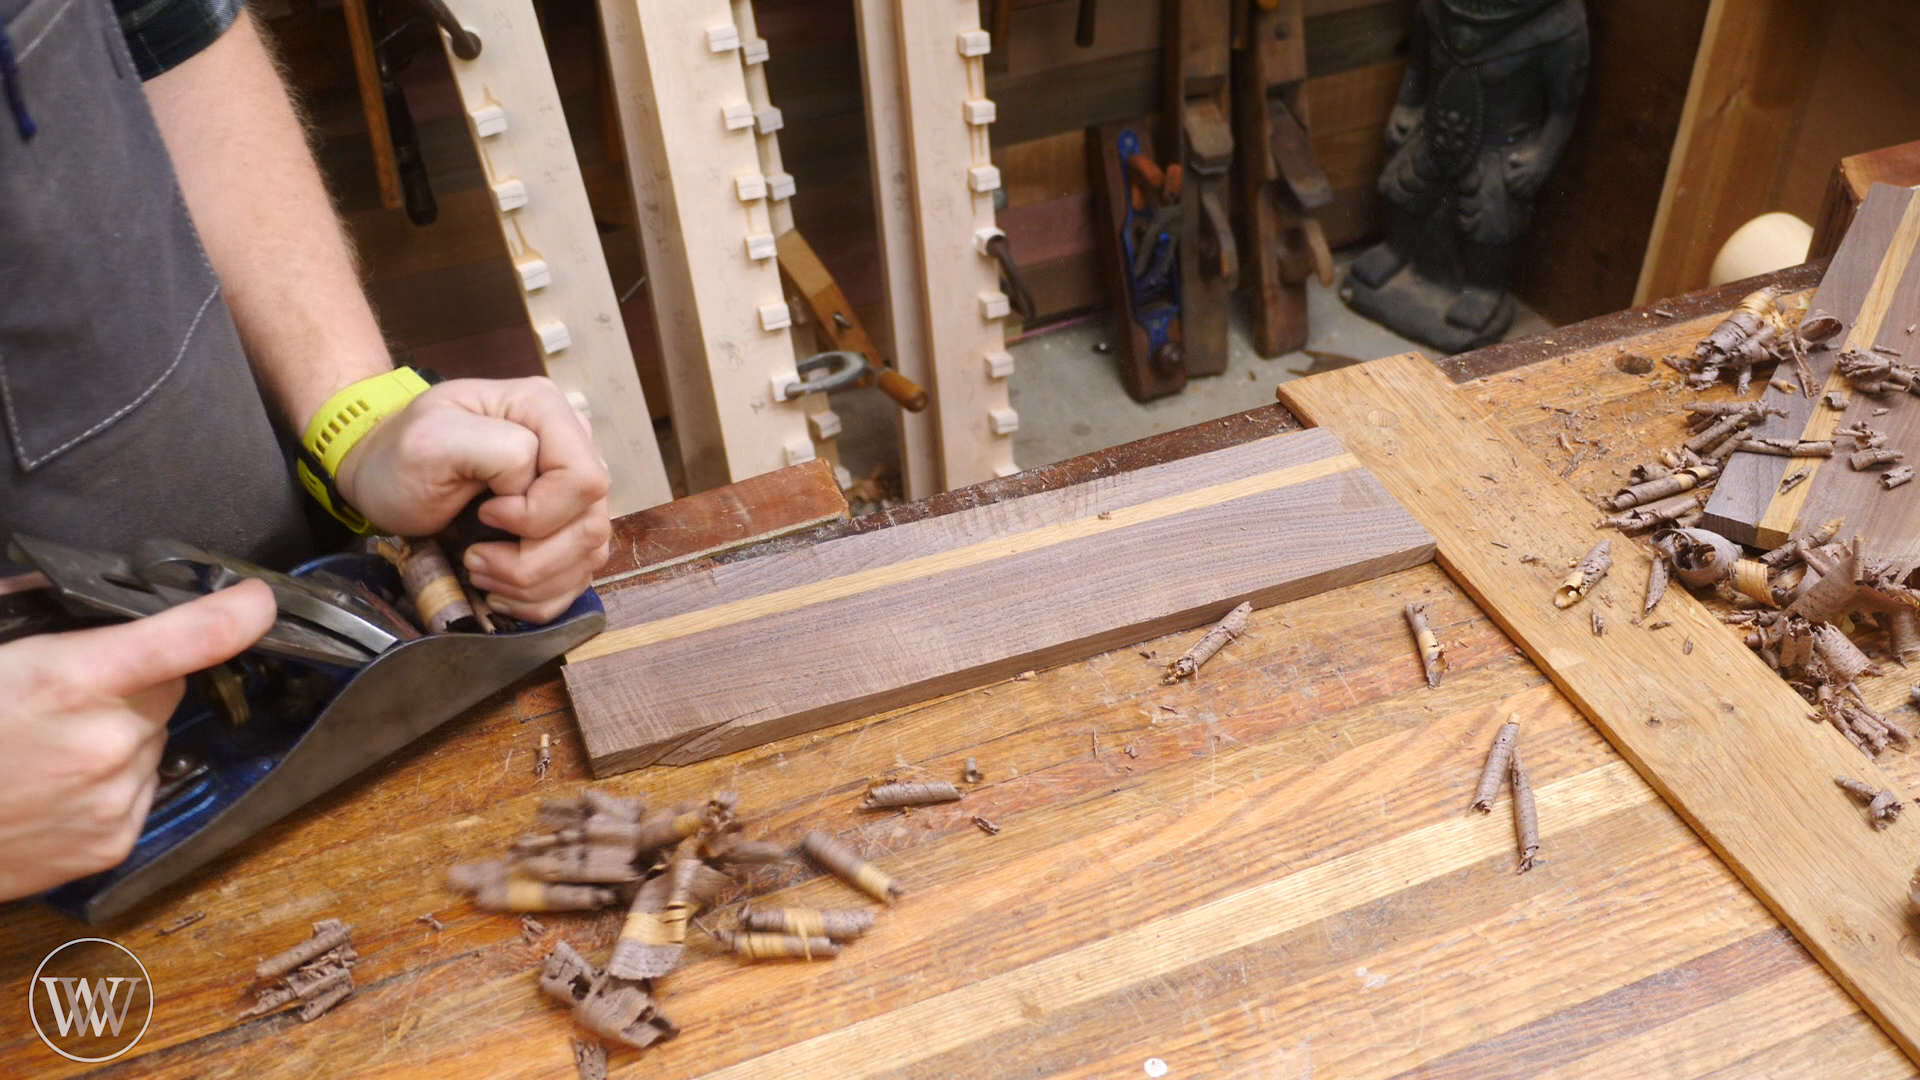
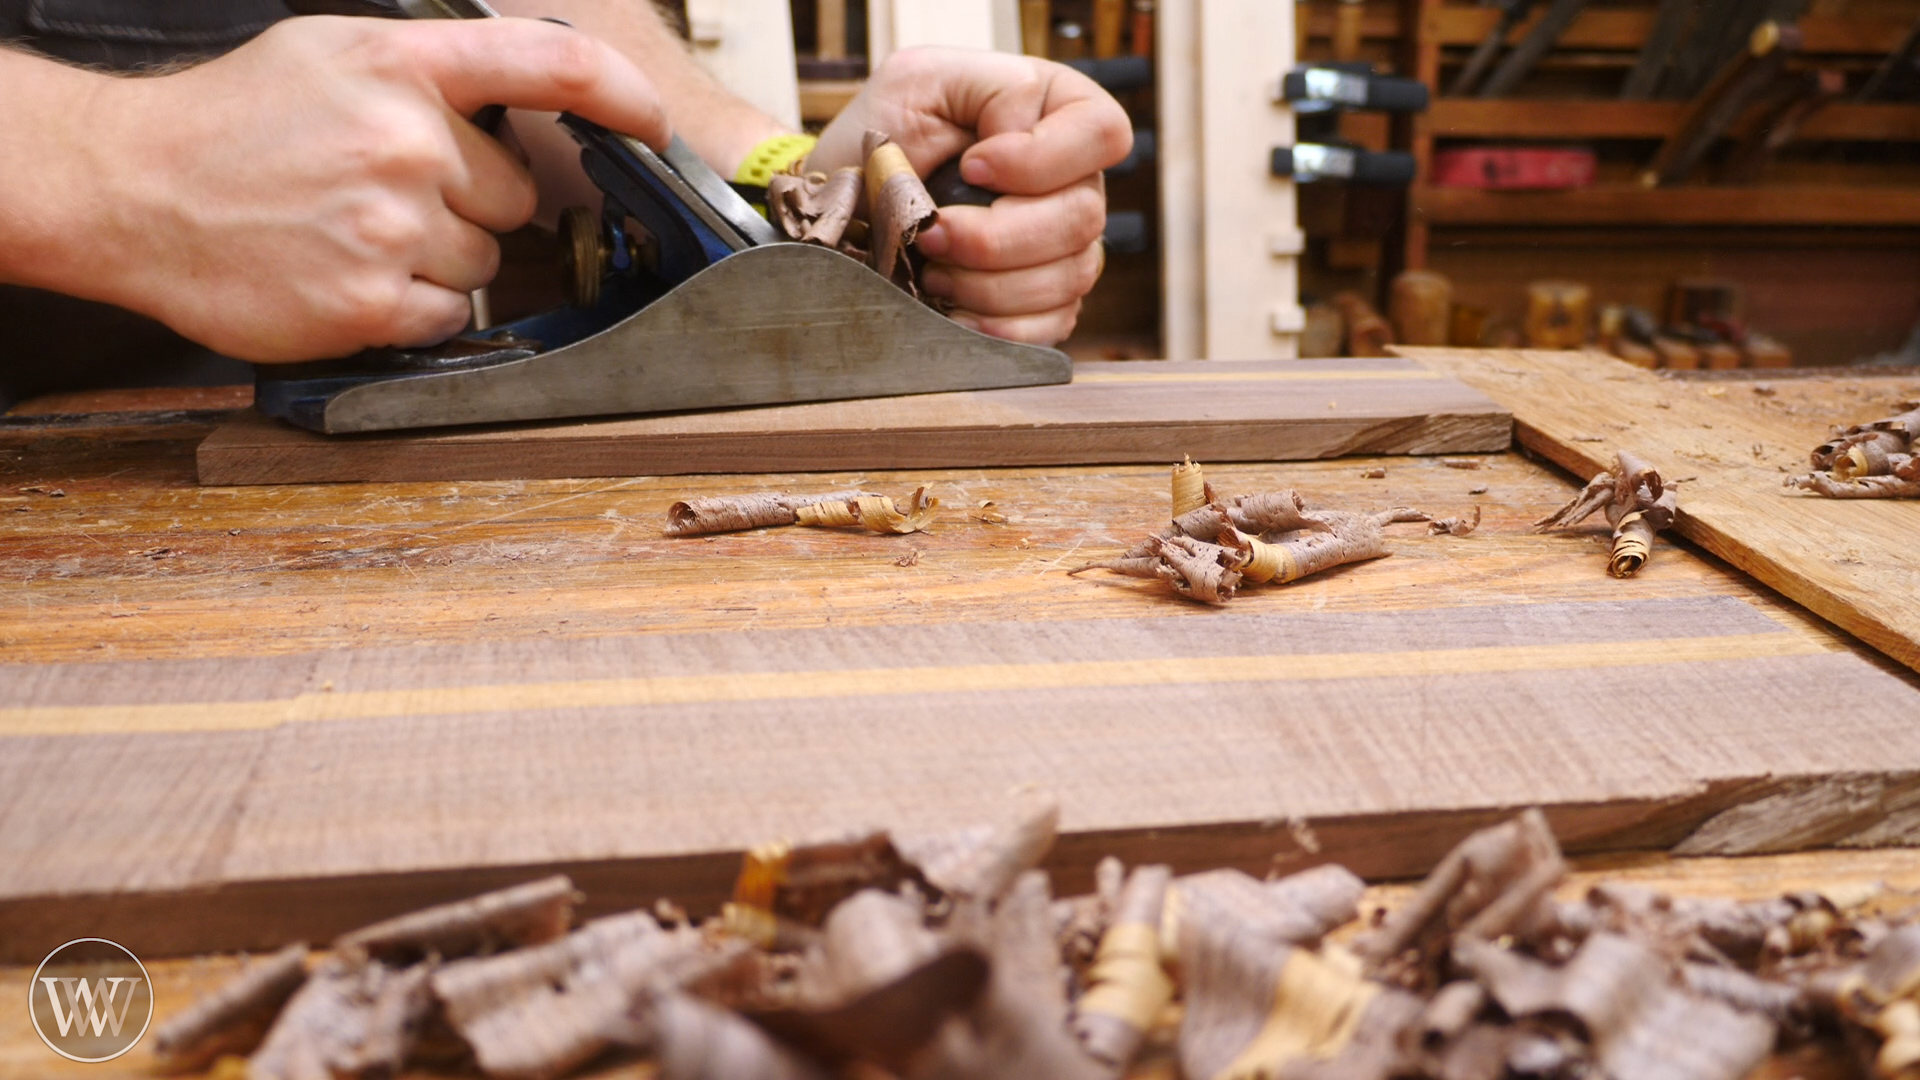
Next, we need to smooth out the edges of the boards so they can be glued together to make one new board. I do this with a hand plane at the workbench and smooth out the edge so that when I put the two boards together I do not see daylight coming through between them. Here's a video on joining boards. https://www.youtube.com/watch?v=ddCHG6RddI4 Next, I use Titebond 3 to glue the boards together. I'm using Titebond 3 because it is water resistant and these coasters may be getting wet in the future. Next, I will use several bar clamps and glue the boards together. Let them sit overnight and they'll be ready for the next step.
Step 3. Shape the stock
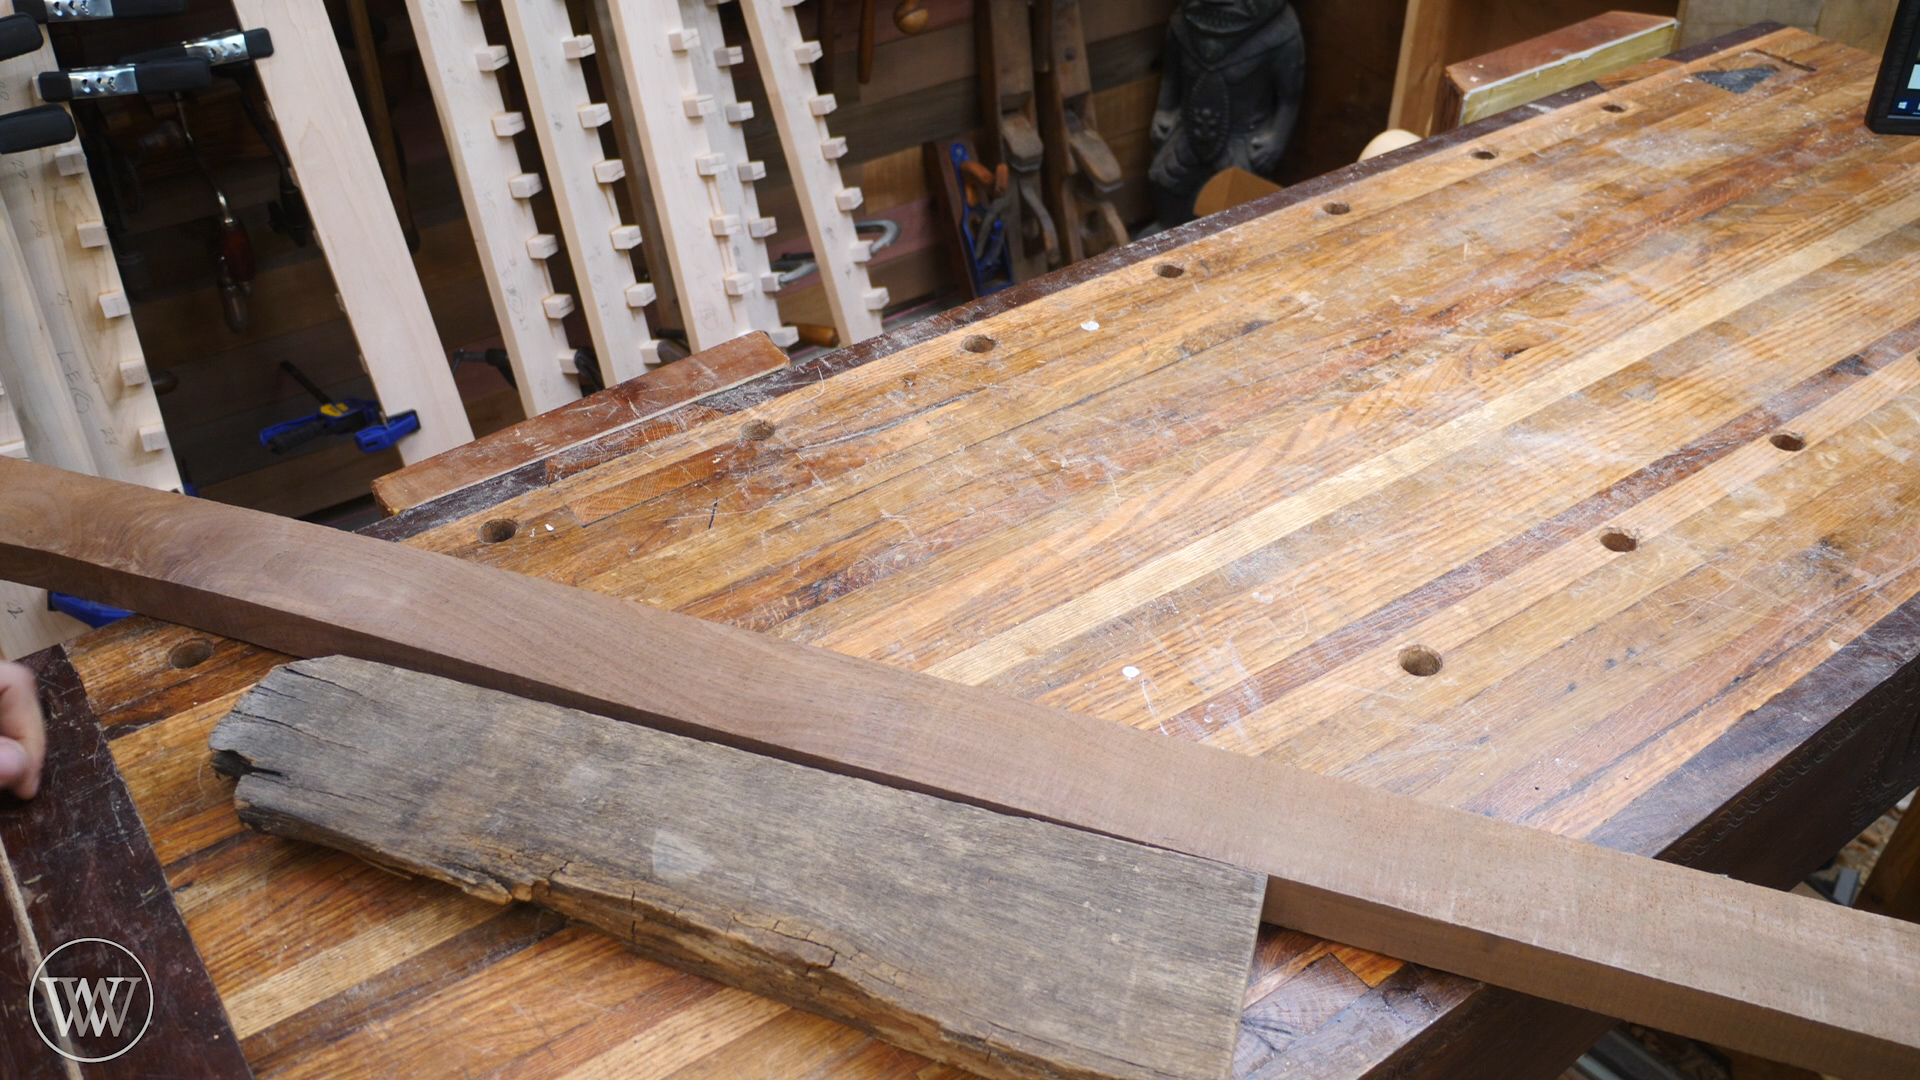
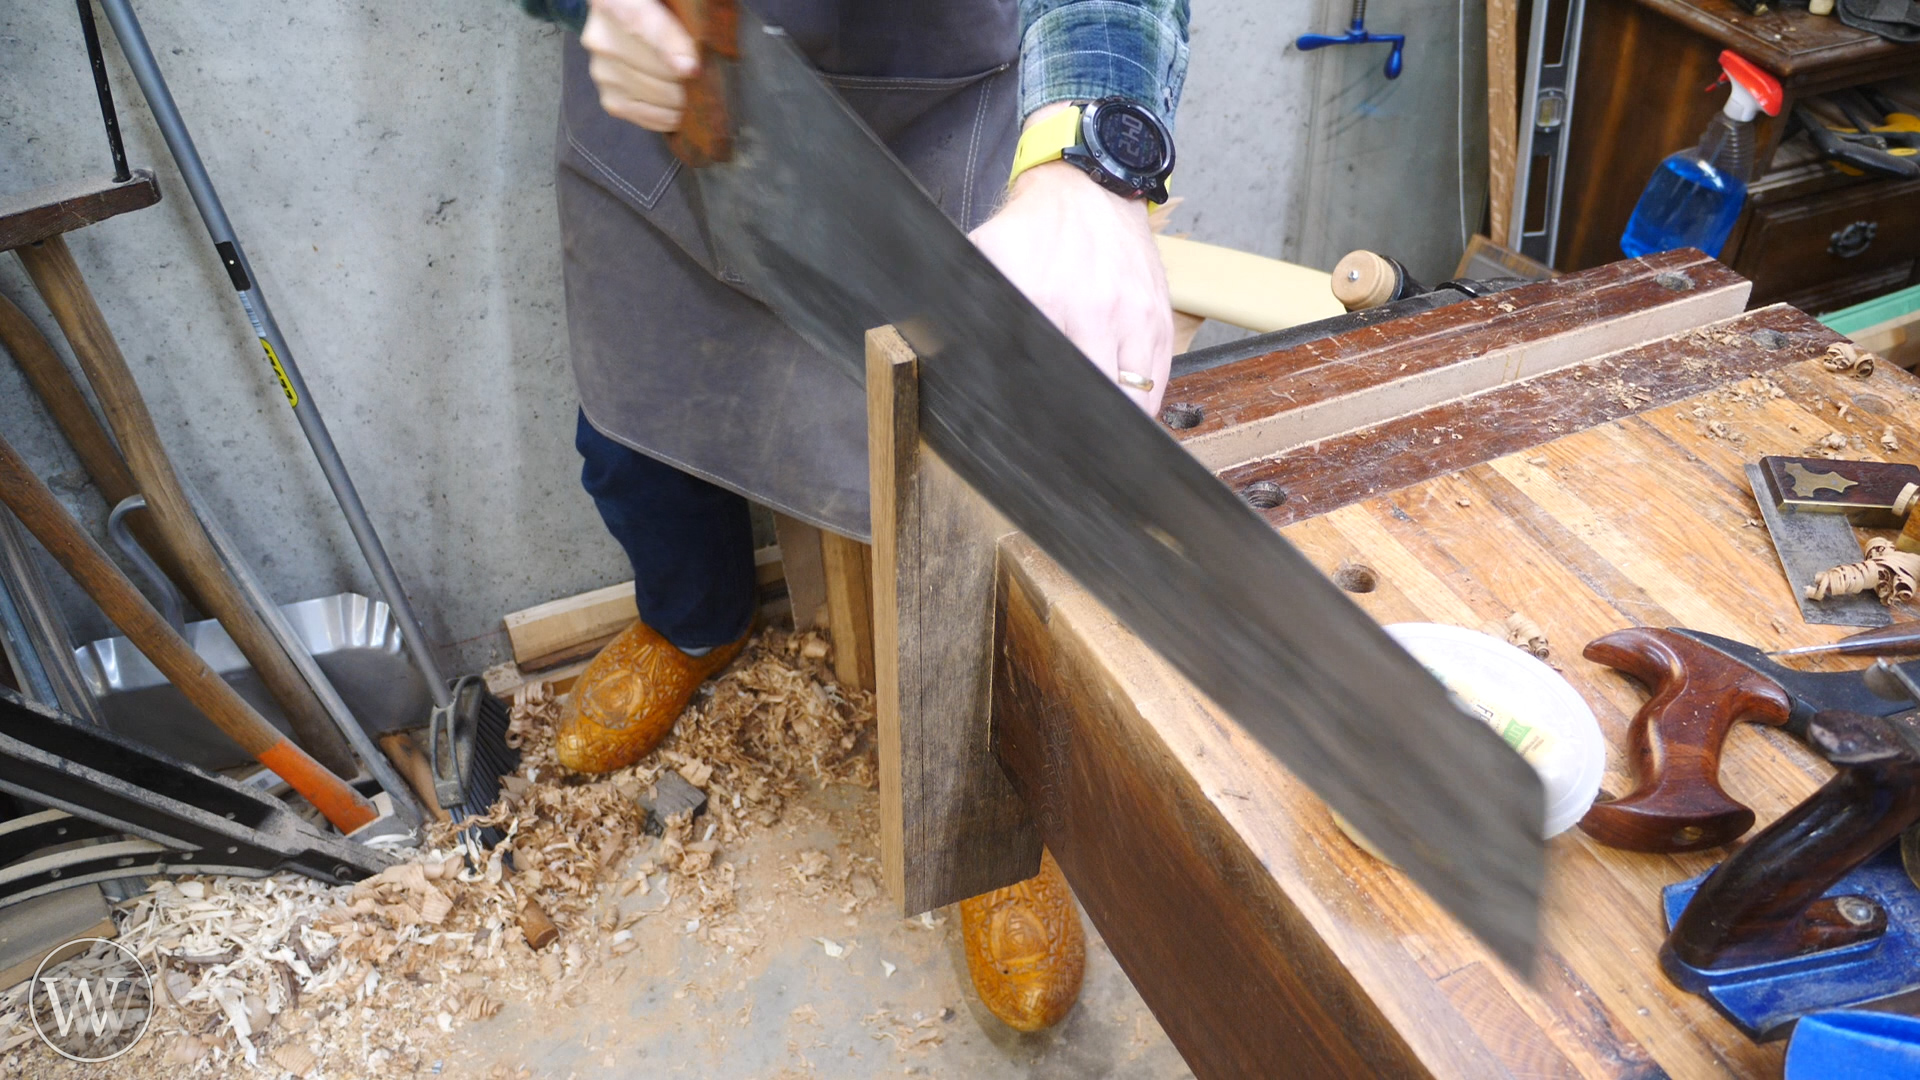
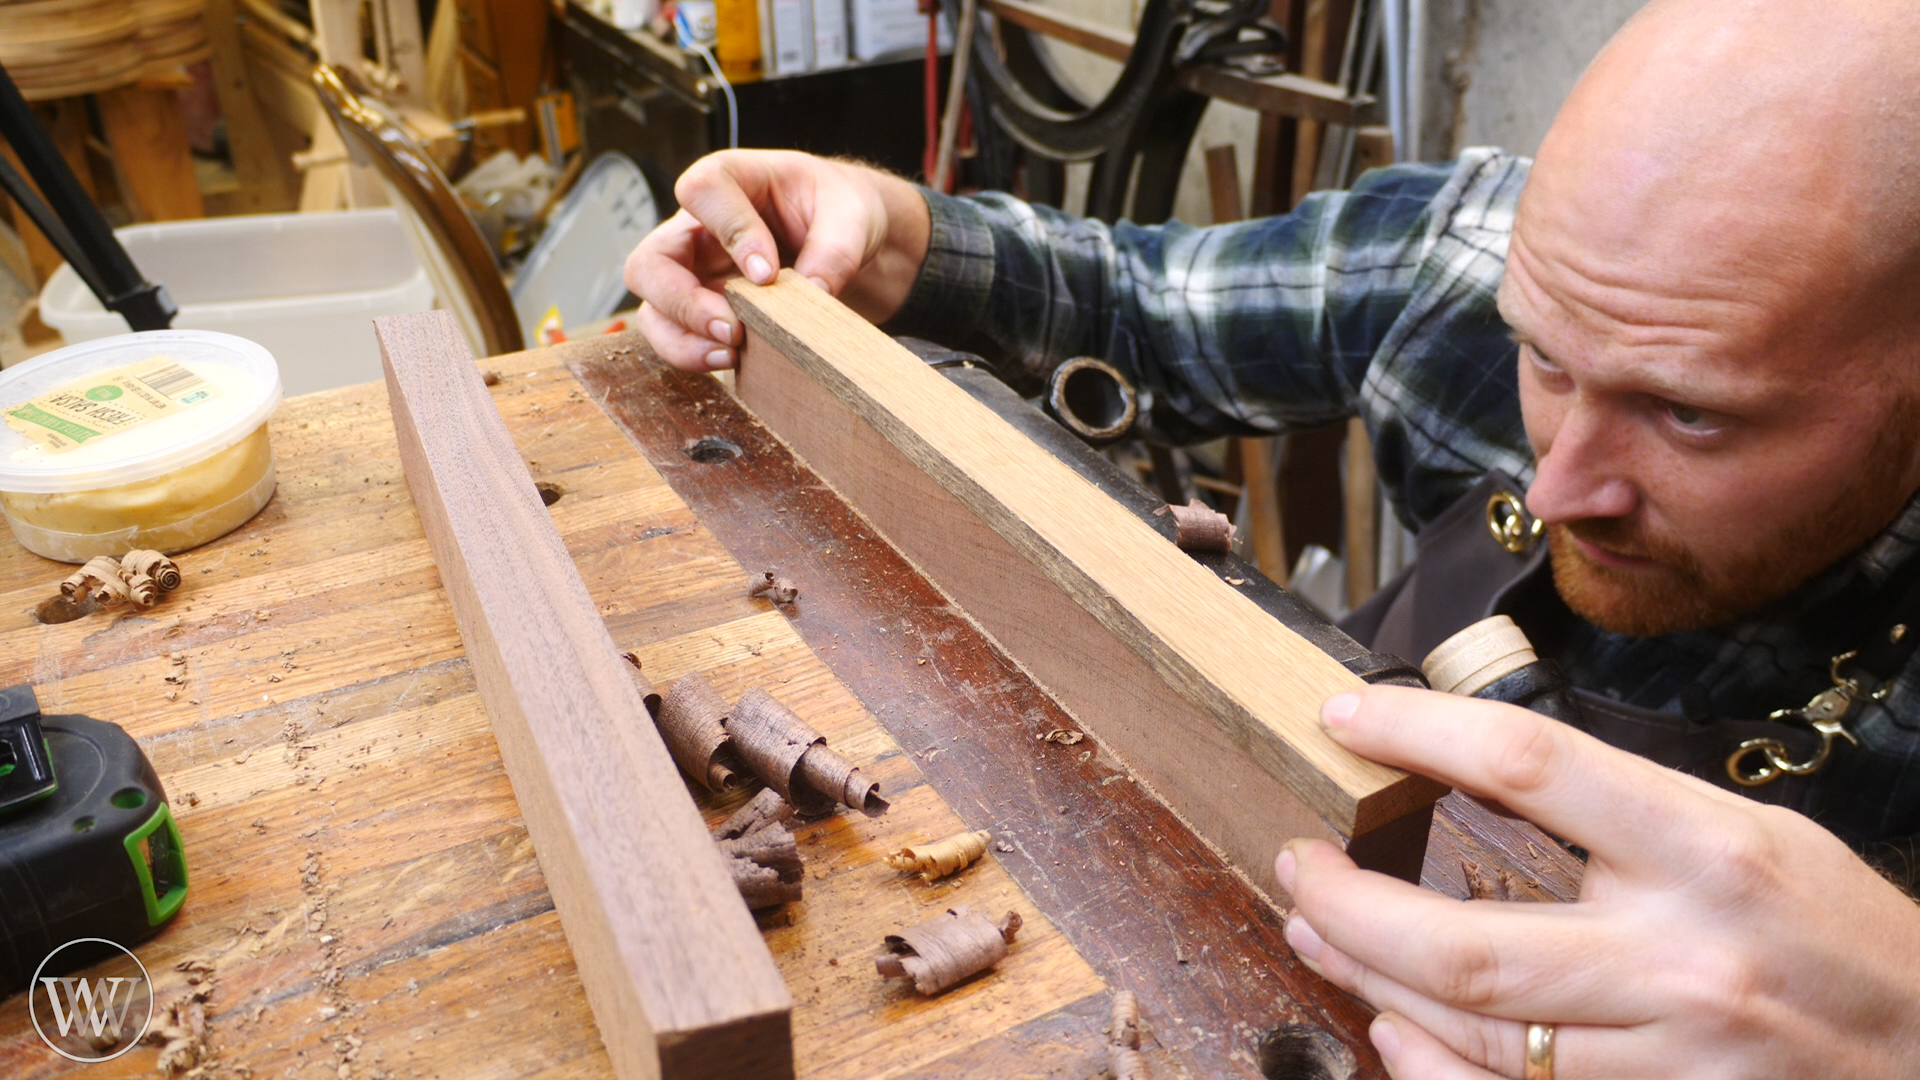
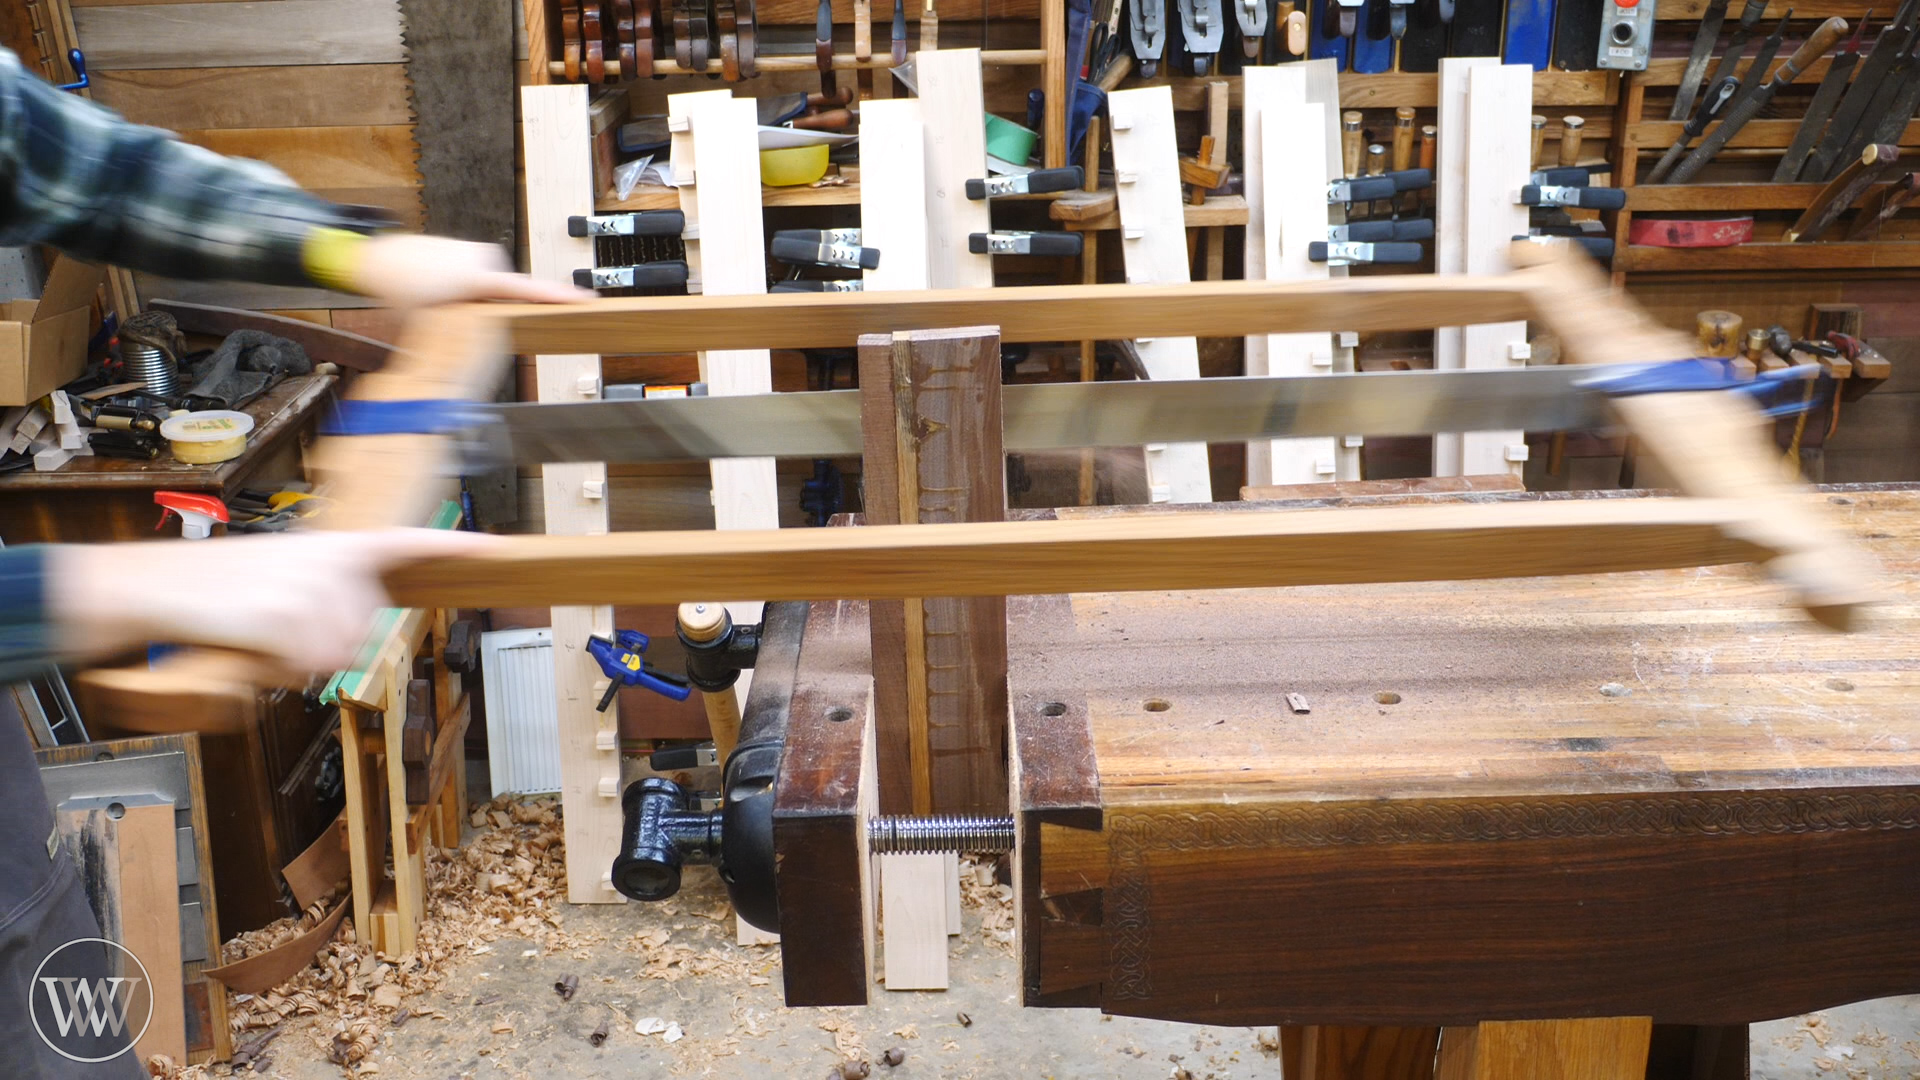
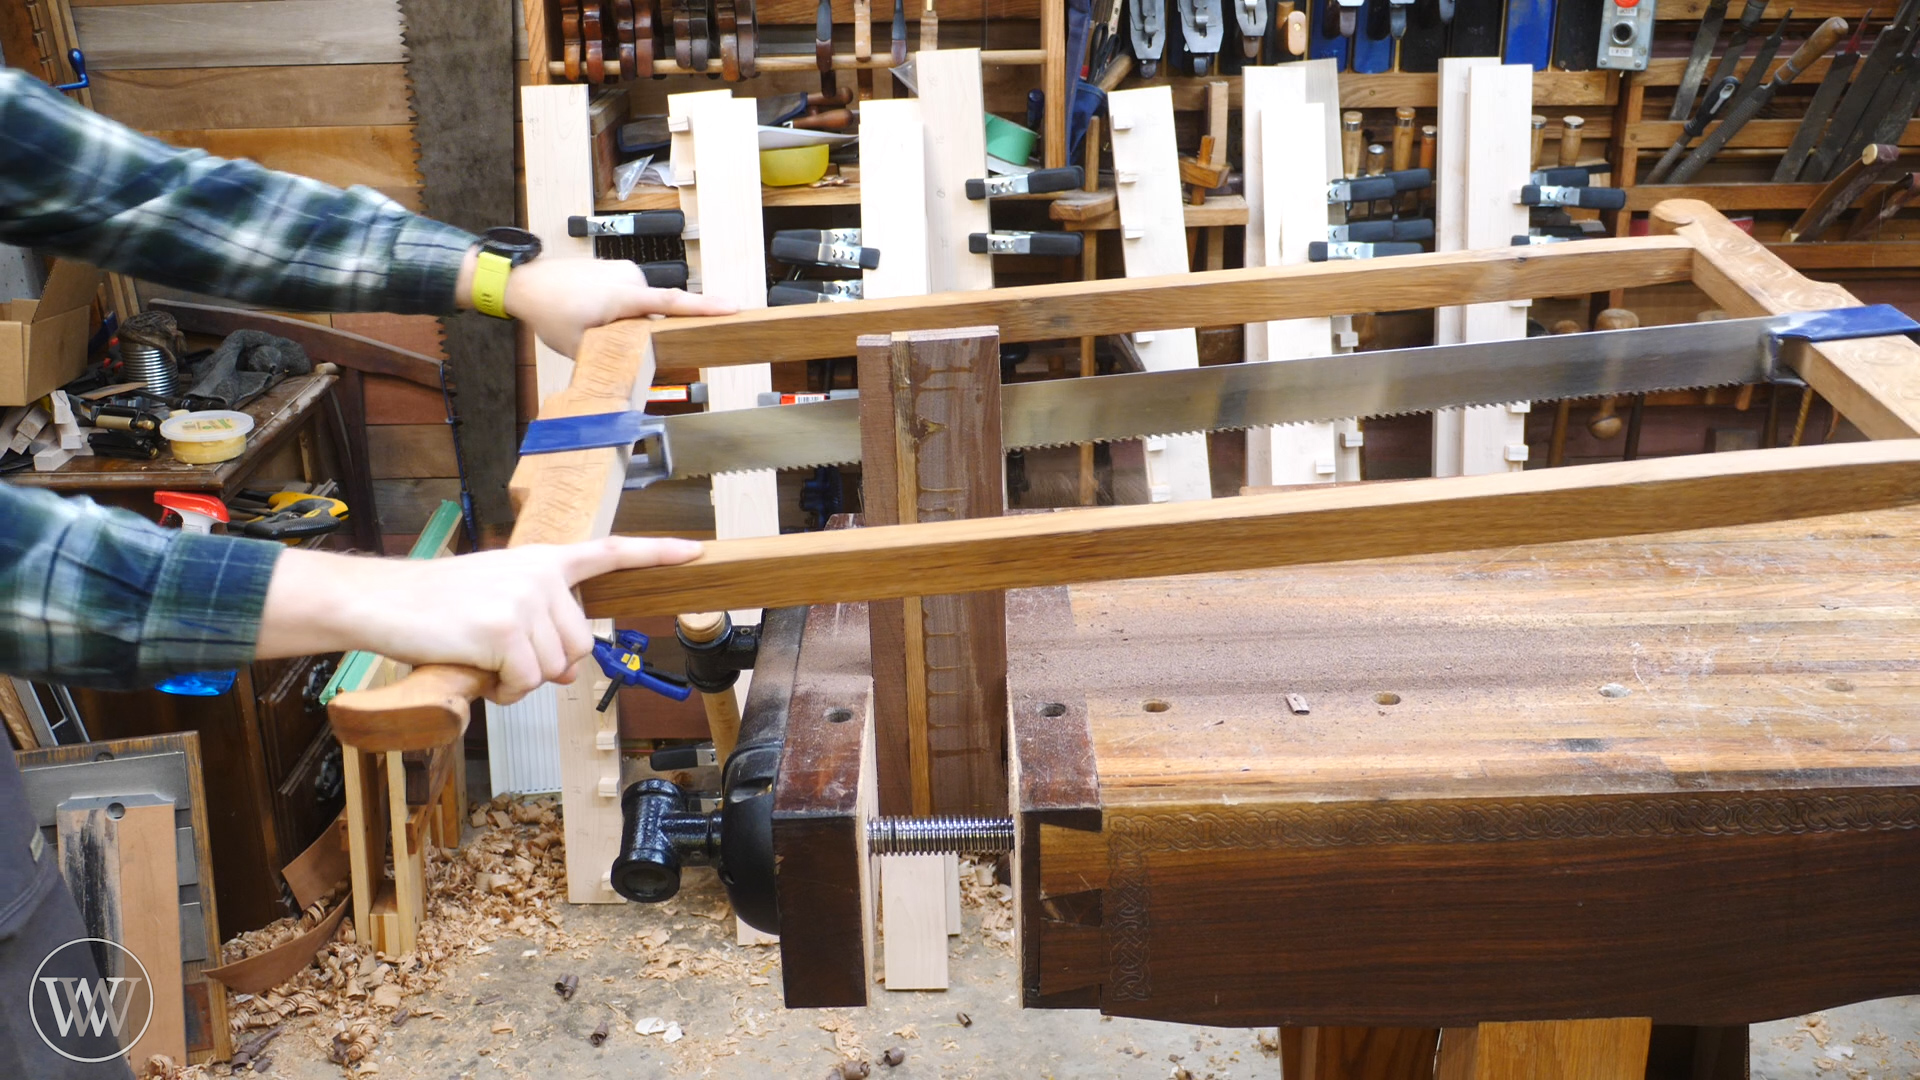
Now, we have one large board we need to cut six coasters out of at this point the stock board is 16 inch long by 6 inch wide by 1 inch thick. I want my coasters to be 4 in by 4 in by 1/4 in. I start by ripping the board down to four inch wide. This will place the half inch strip of white oak off center which I think makes it look artistic. But if you want it to be centered then you could remove the same amount of material from both sides of the walnut. Next, I use a large saw to resaw this board into two pieces right down the middle of its thickness. After that we can smooth out all of the surfaces and bring it all to a consistent thickness with a hand plane.
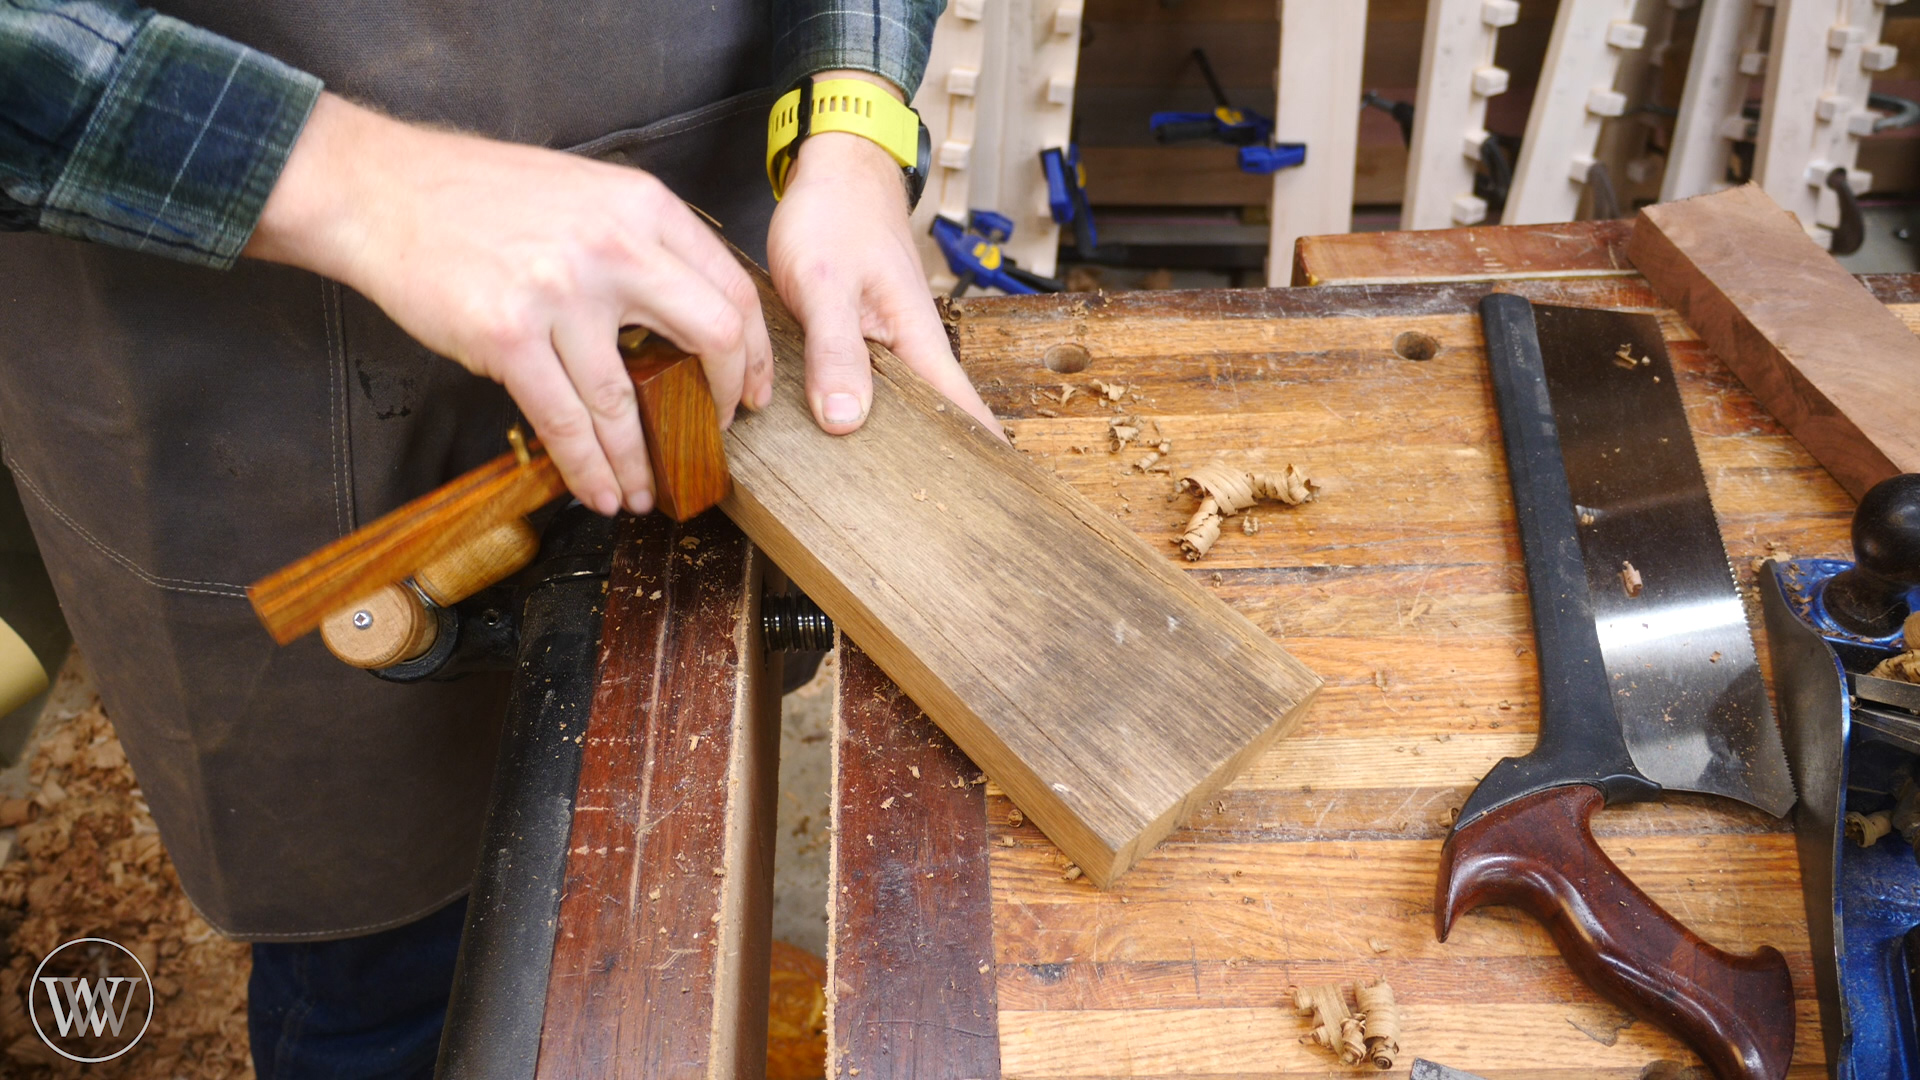
Step 4. Cut the squares
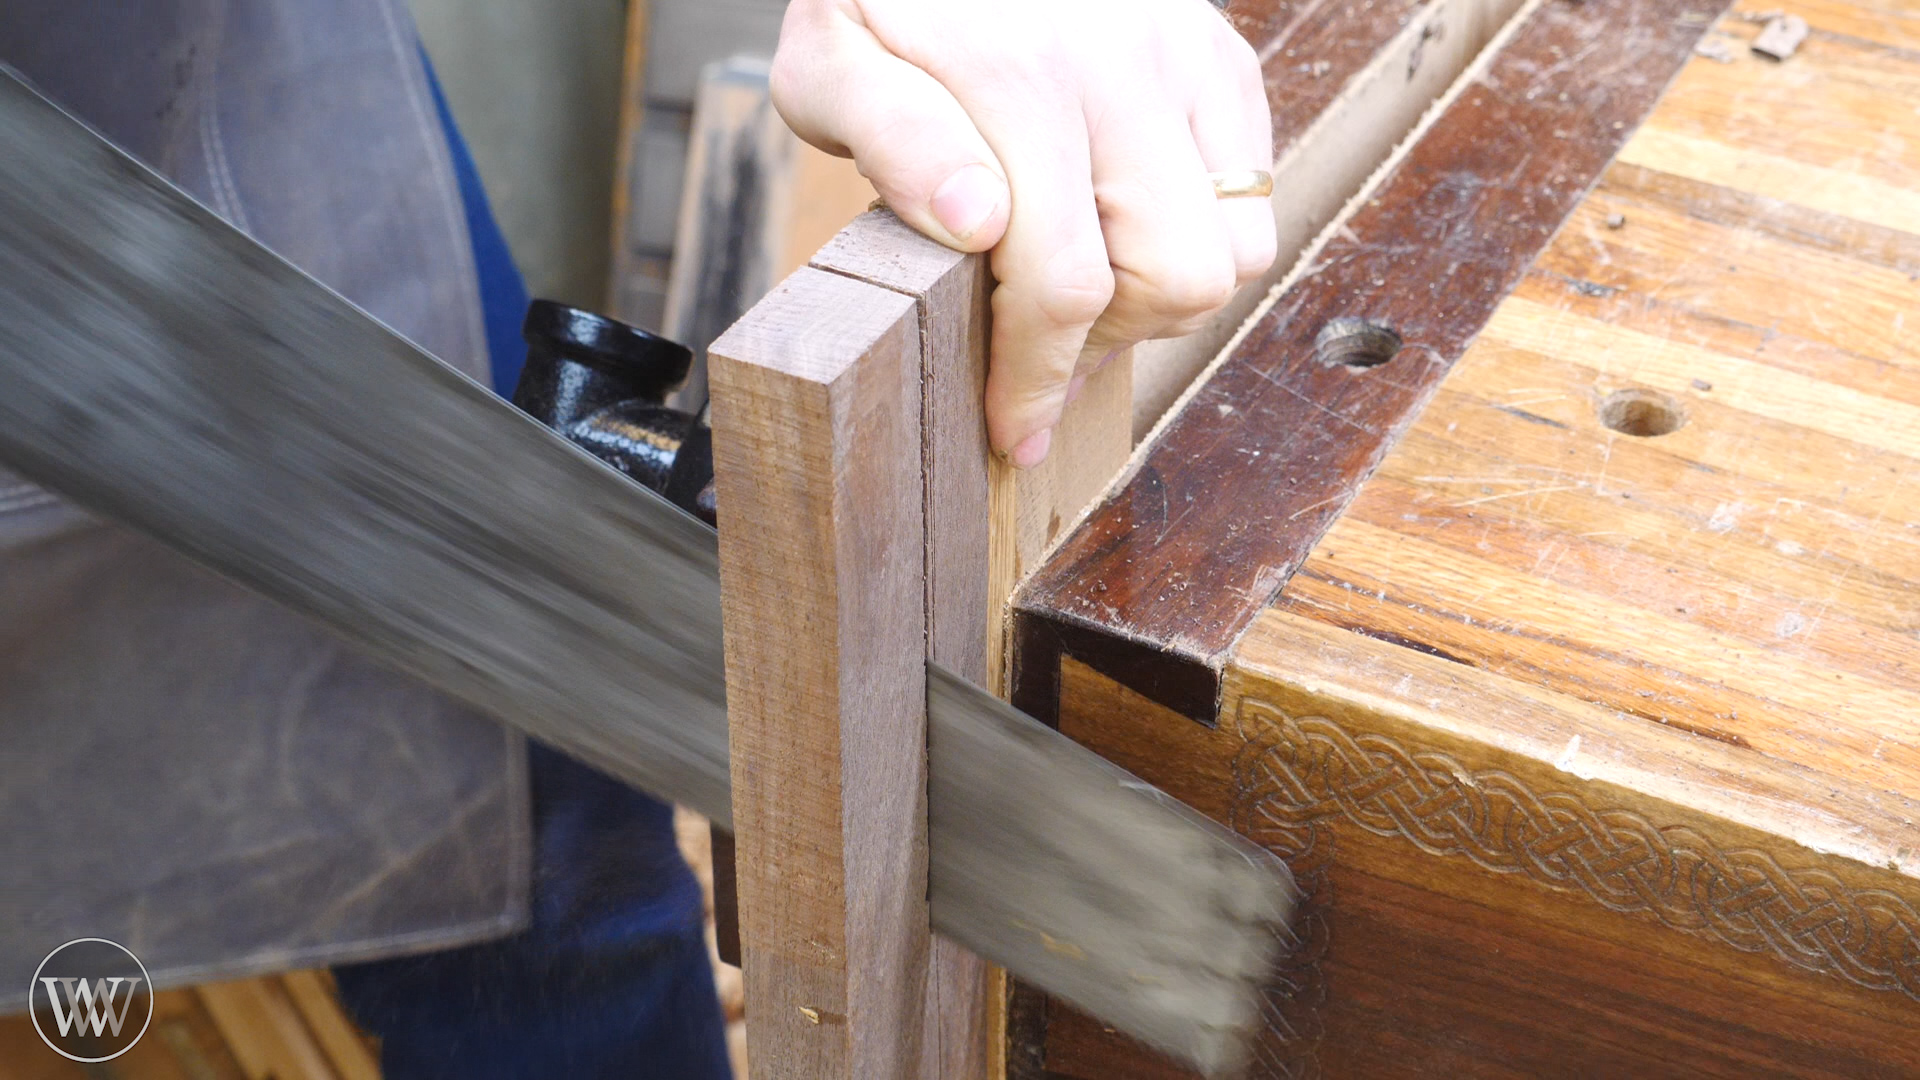
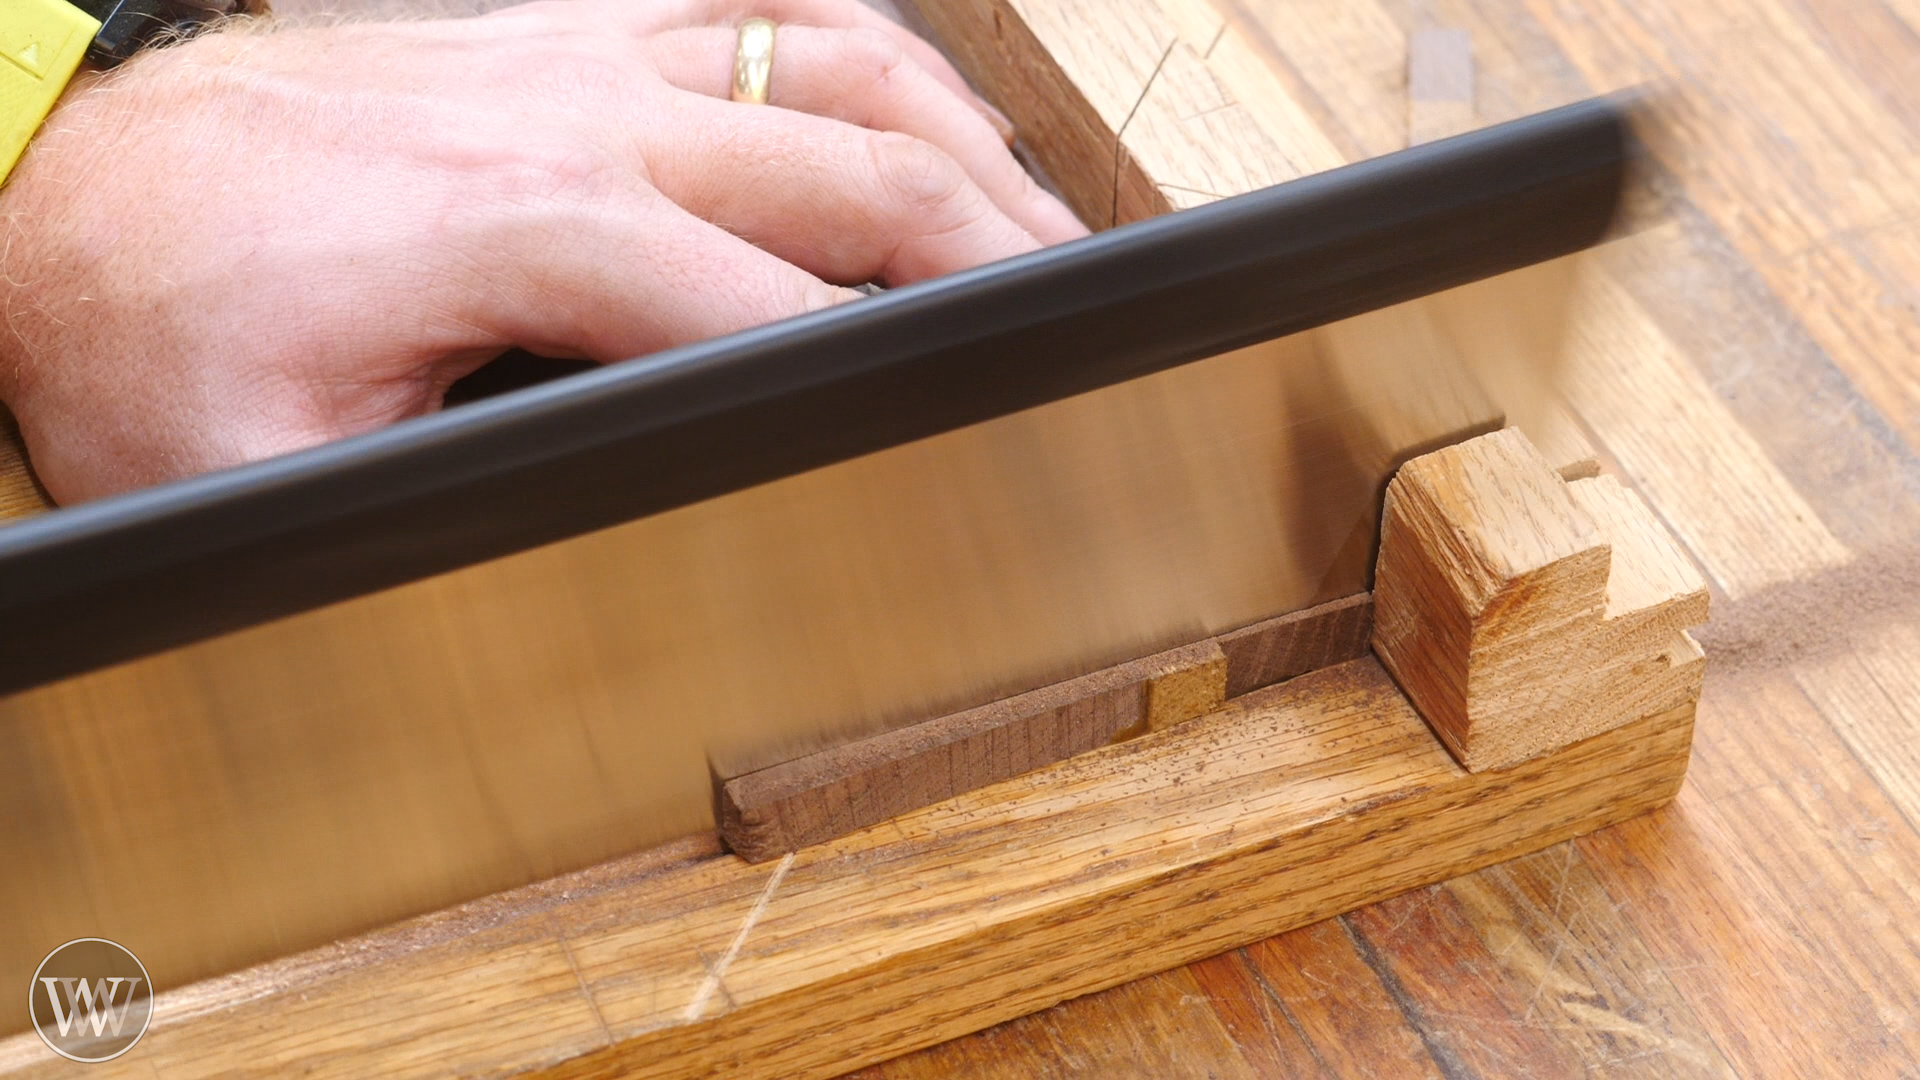
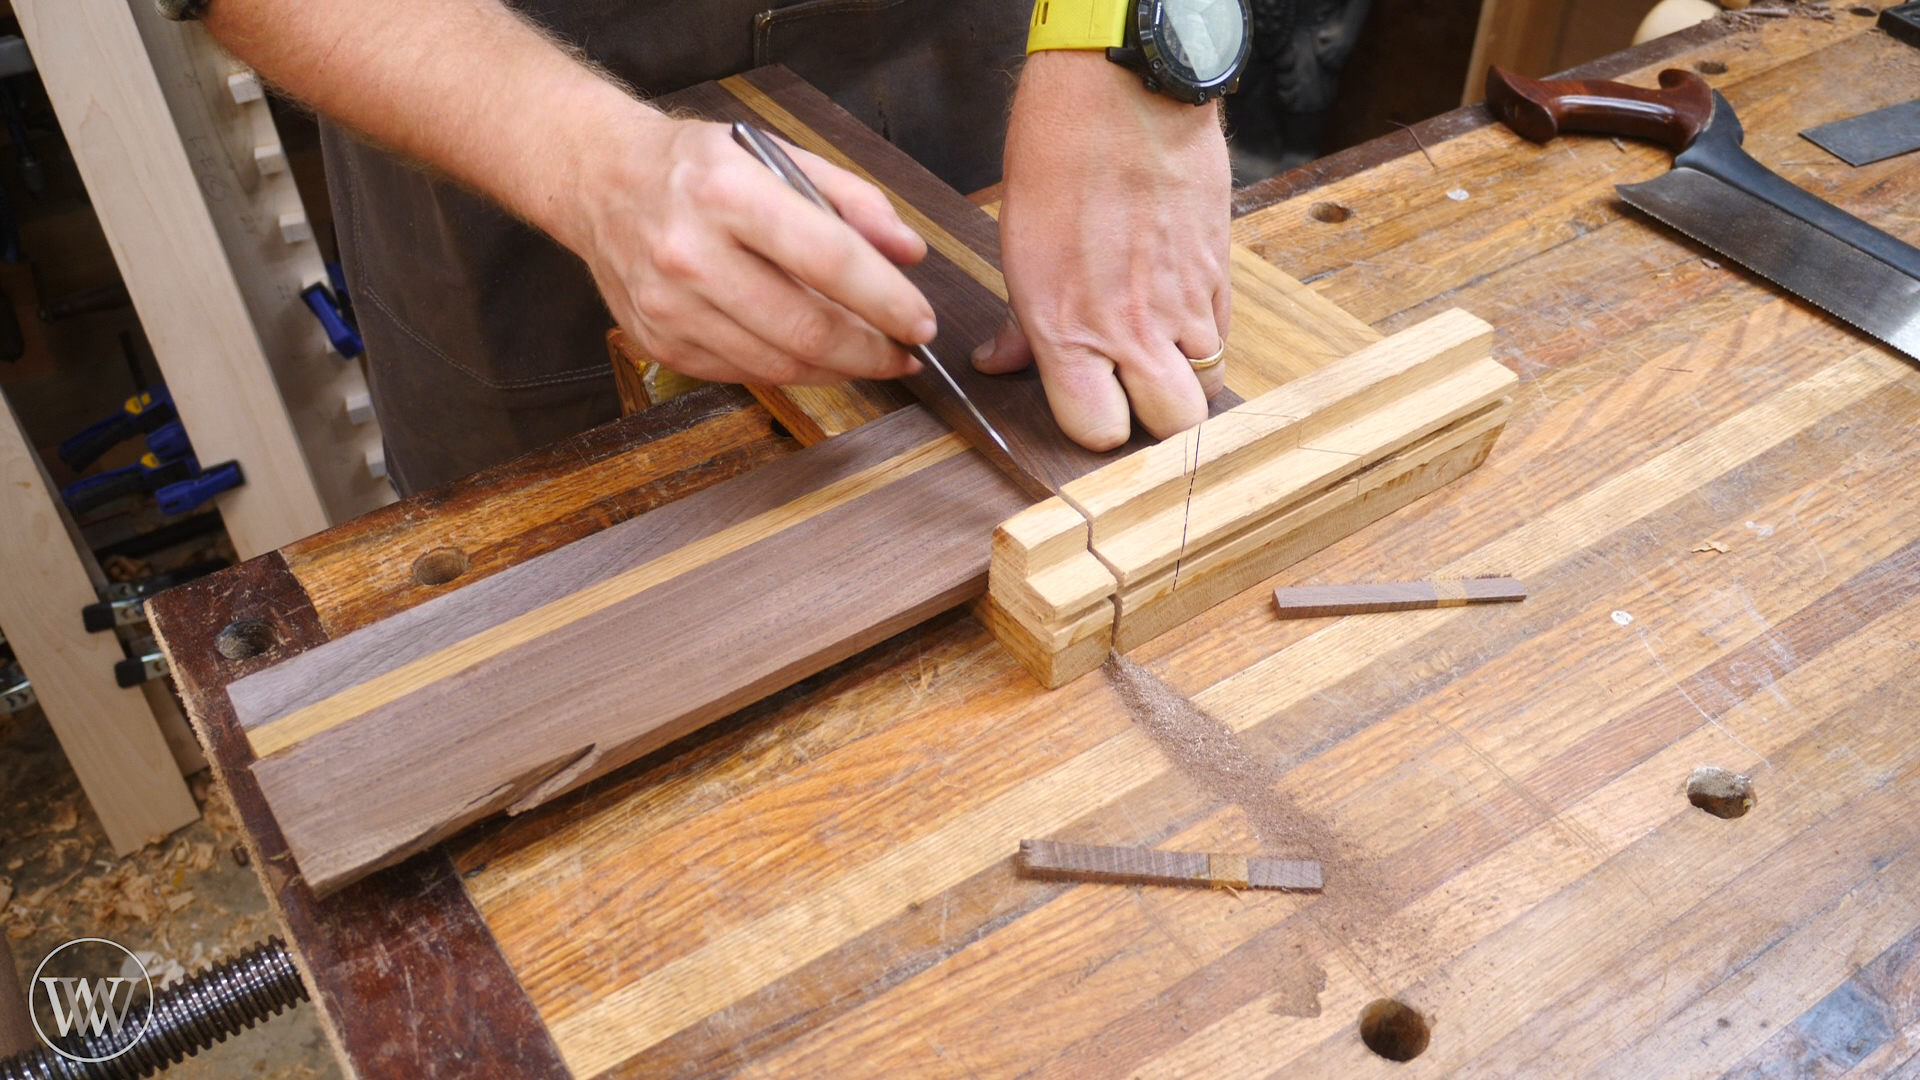
Next, I want to start by cutting one end of each of these boards perfectly square to the side. This will become the reference surface so that we can cut all of these coasters out of the boards. To make sure that the boards are square I use one board to mark the length of the coaster on the second board. This will make sure the length of the board is the exact same as the width of the board. After cutting out all 6 coasters we can now move on to making them interlocking.
Step 5. Drill holes and prep pins
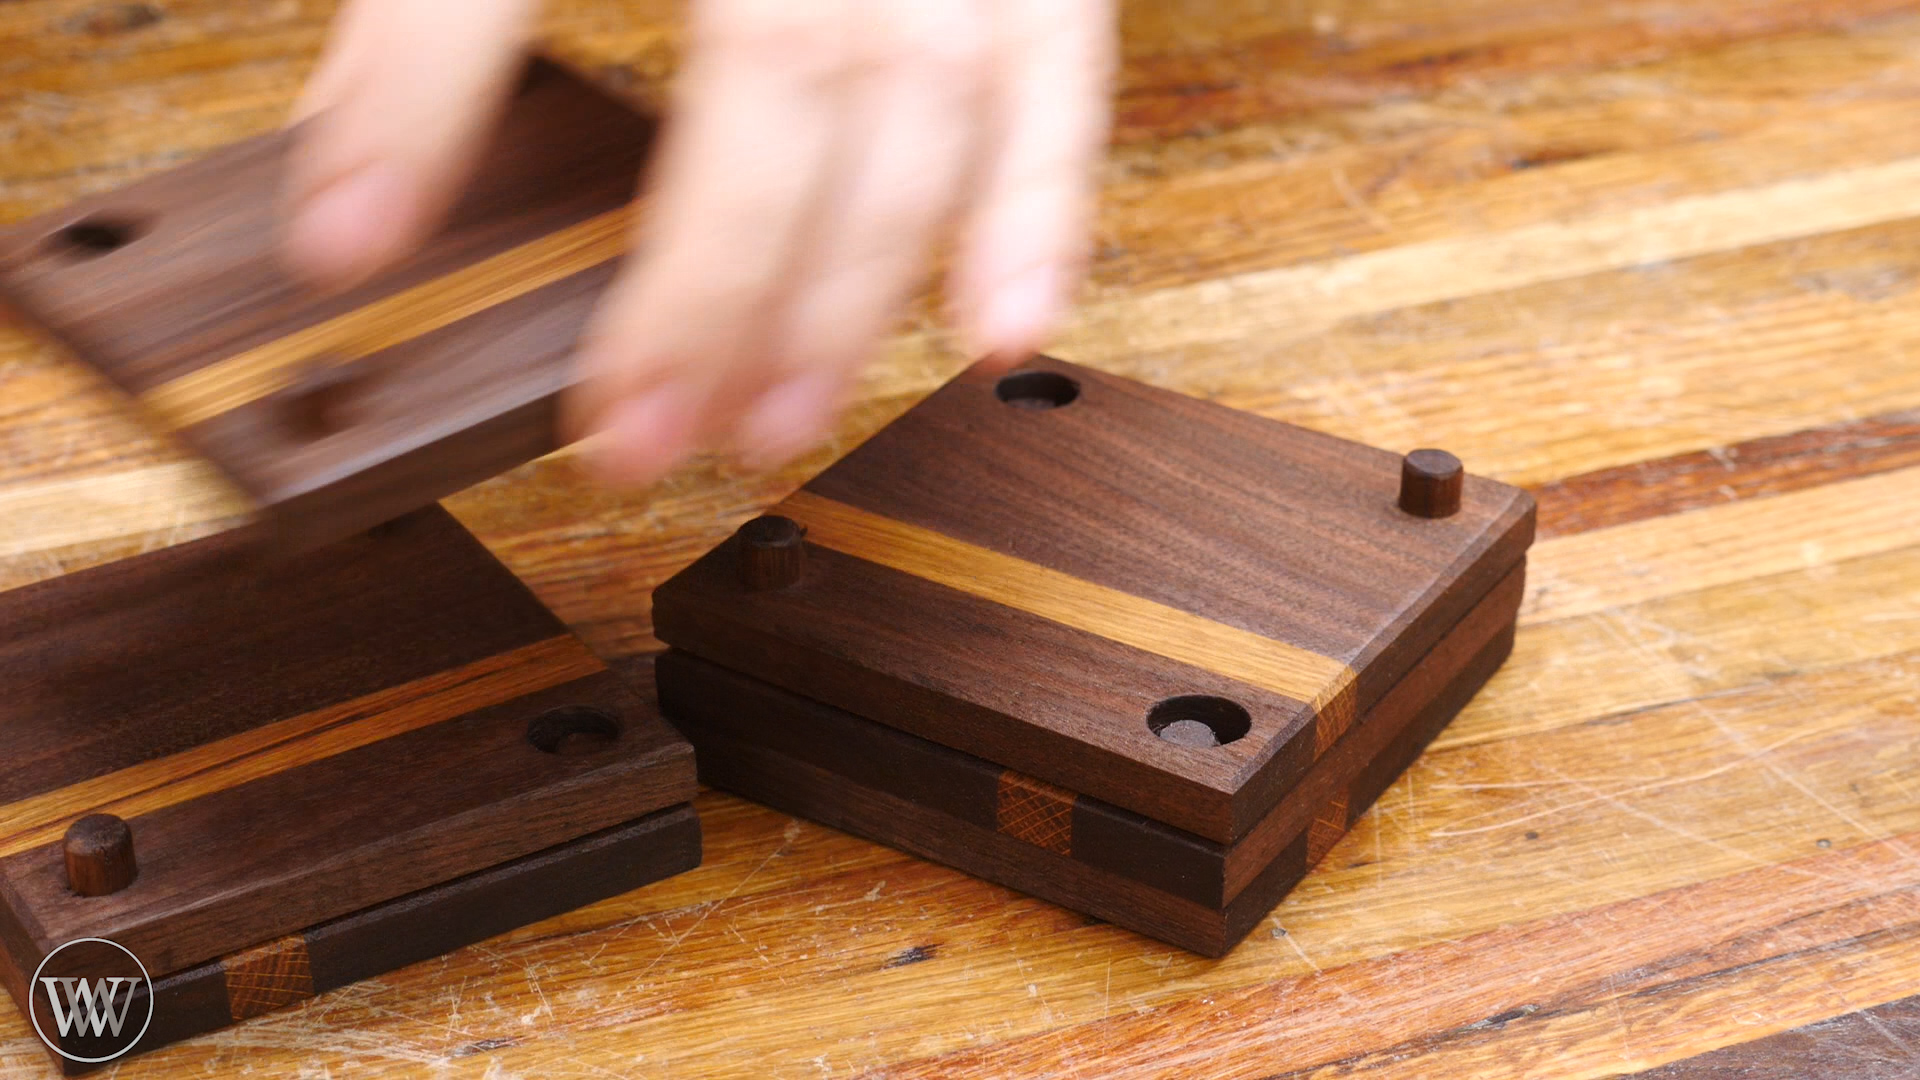
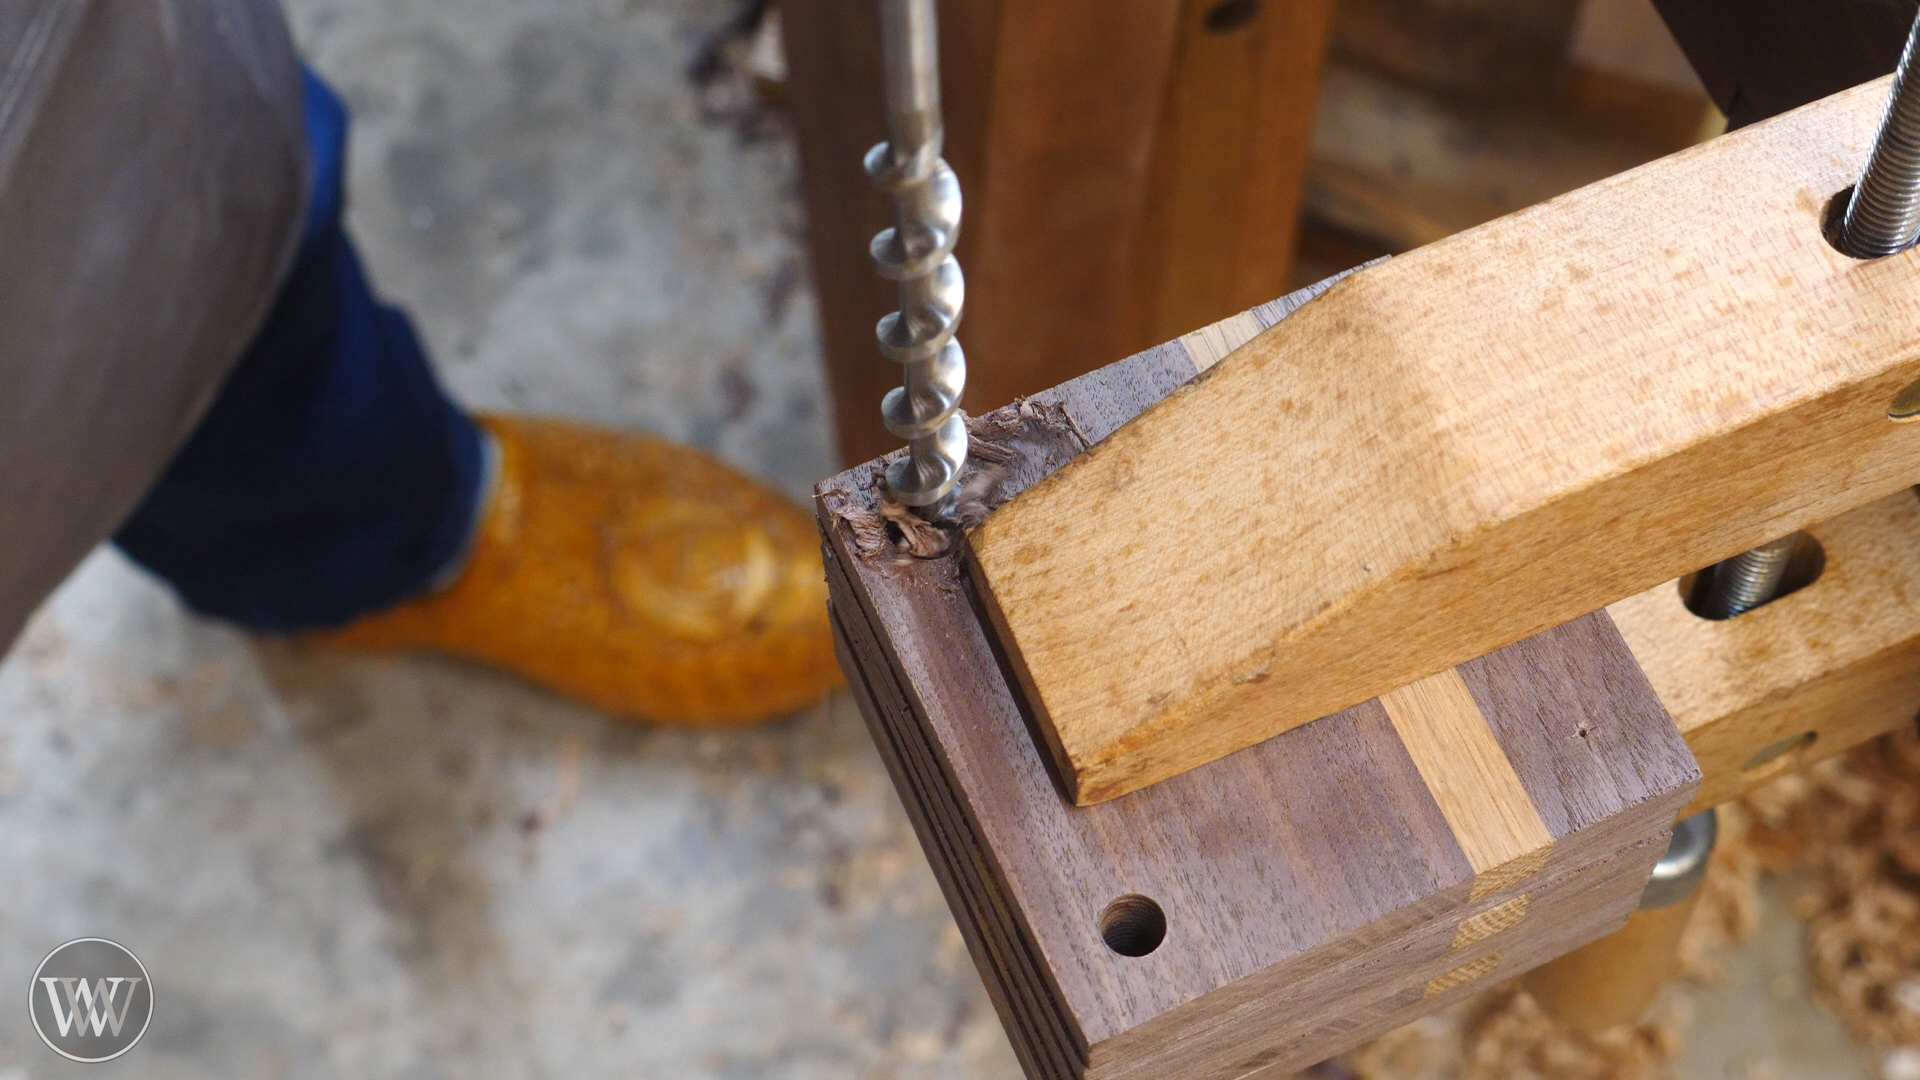
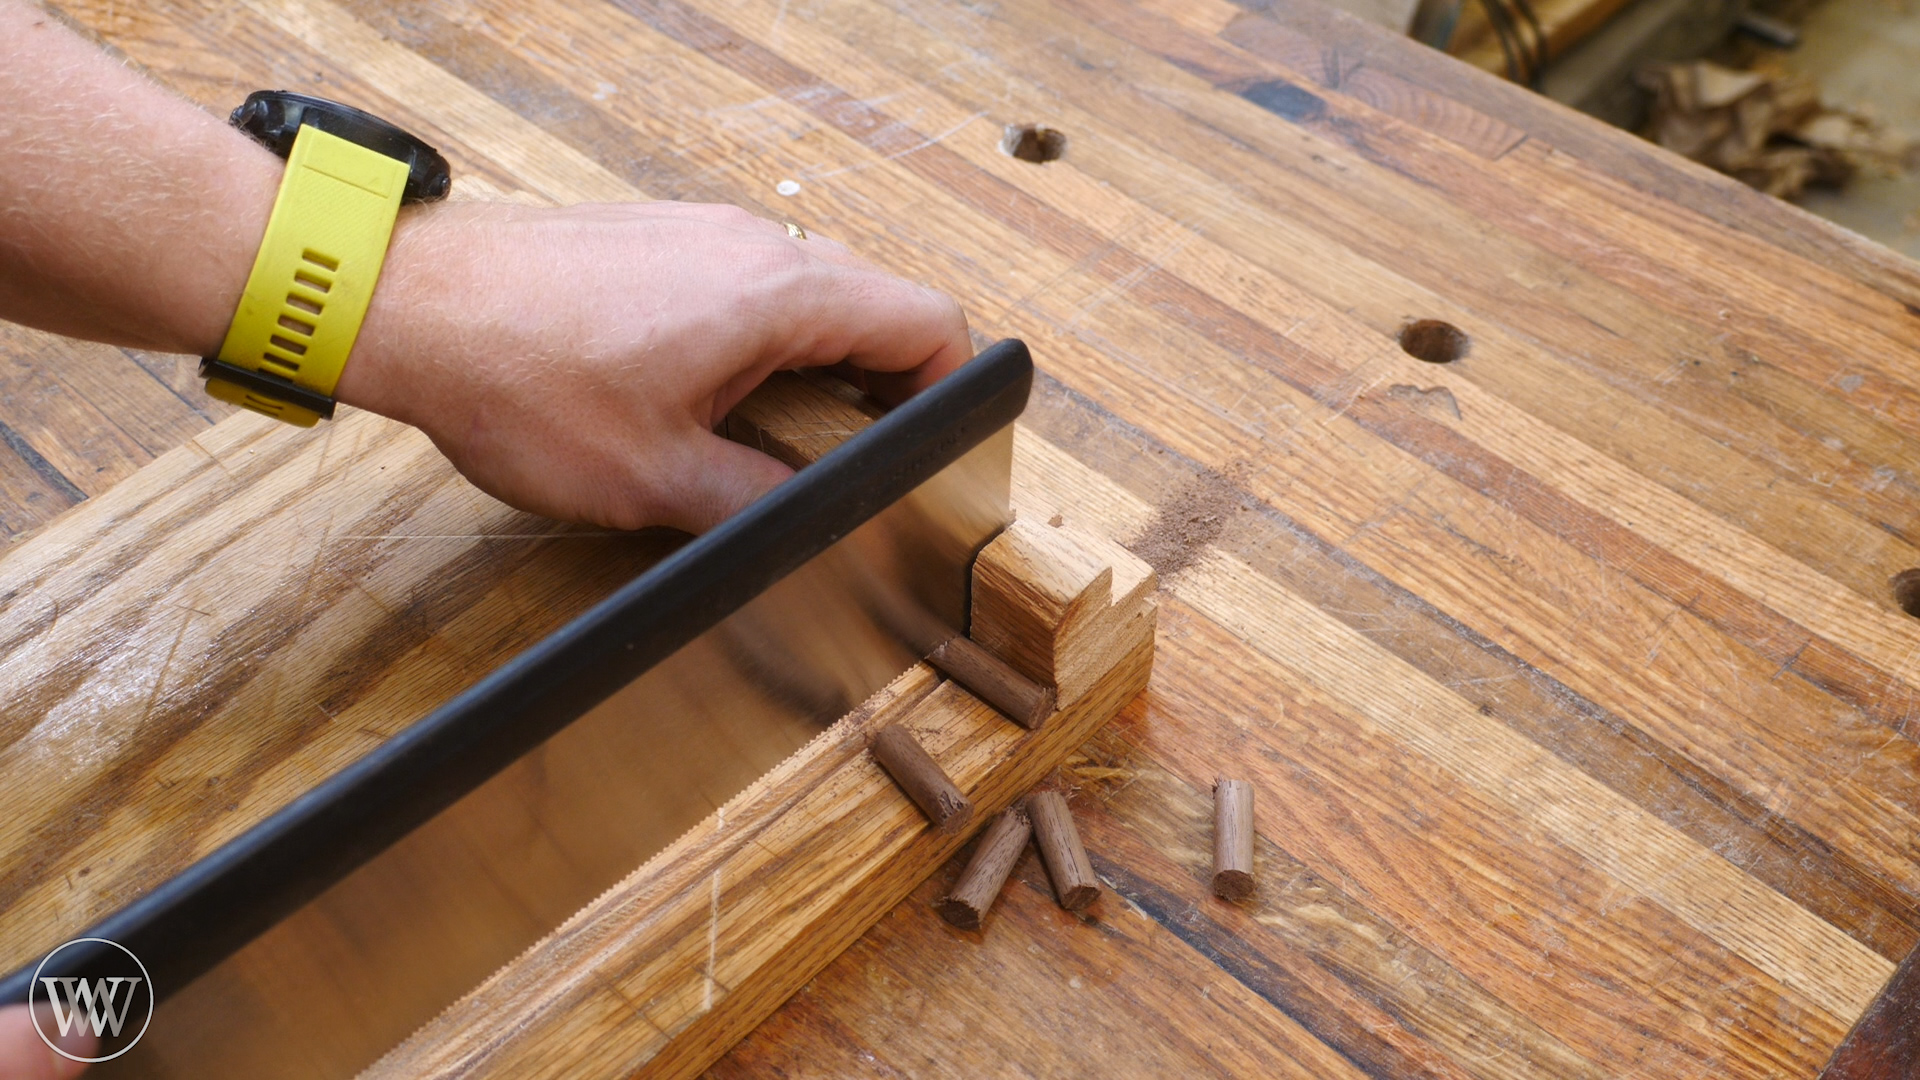
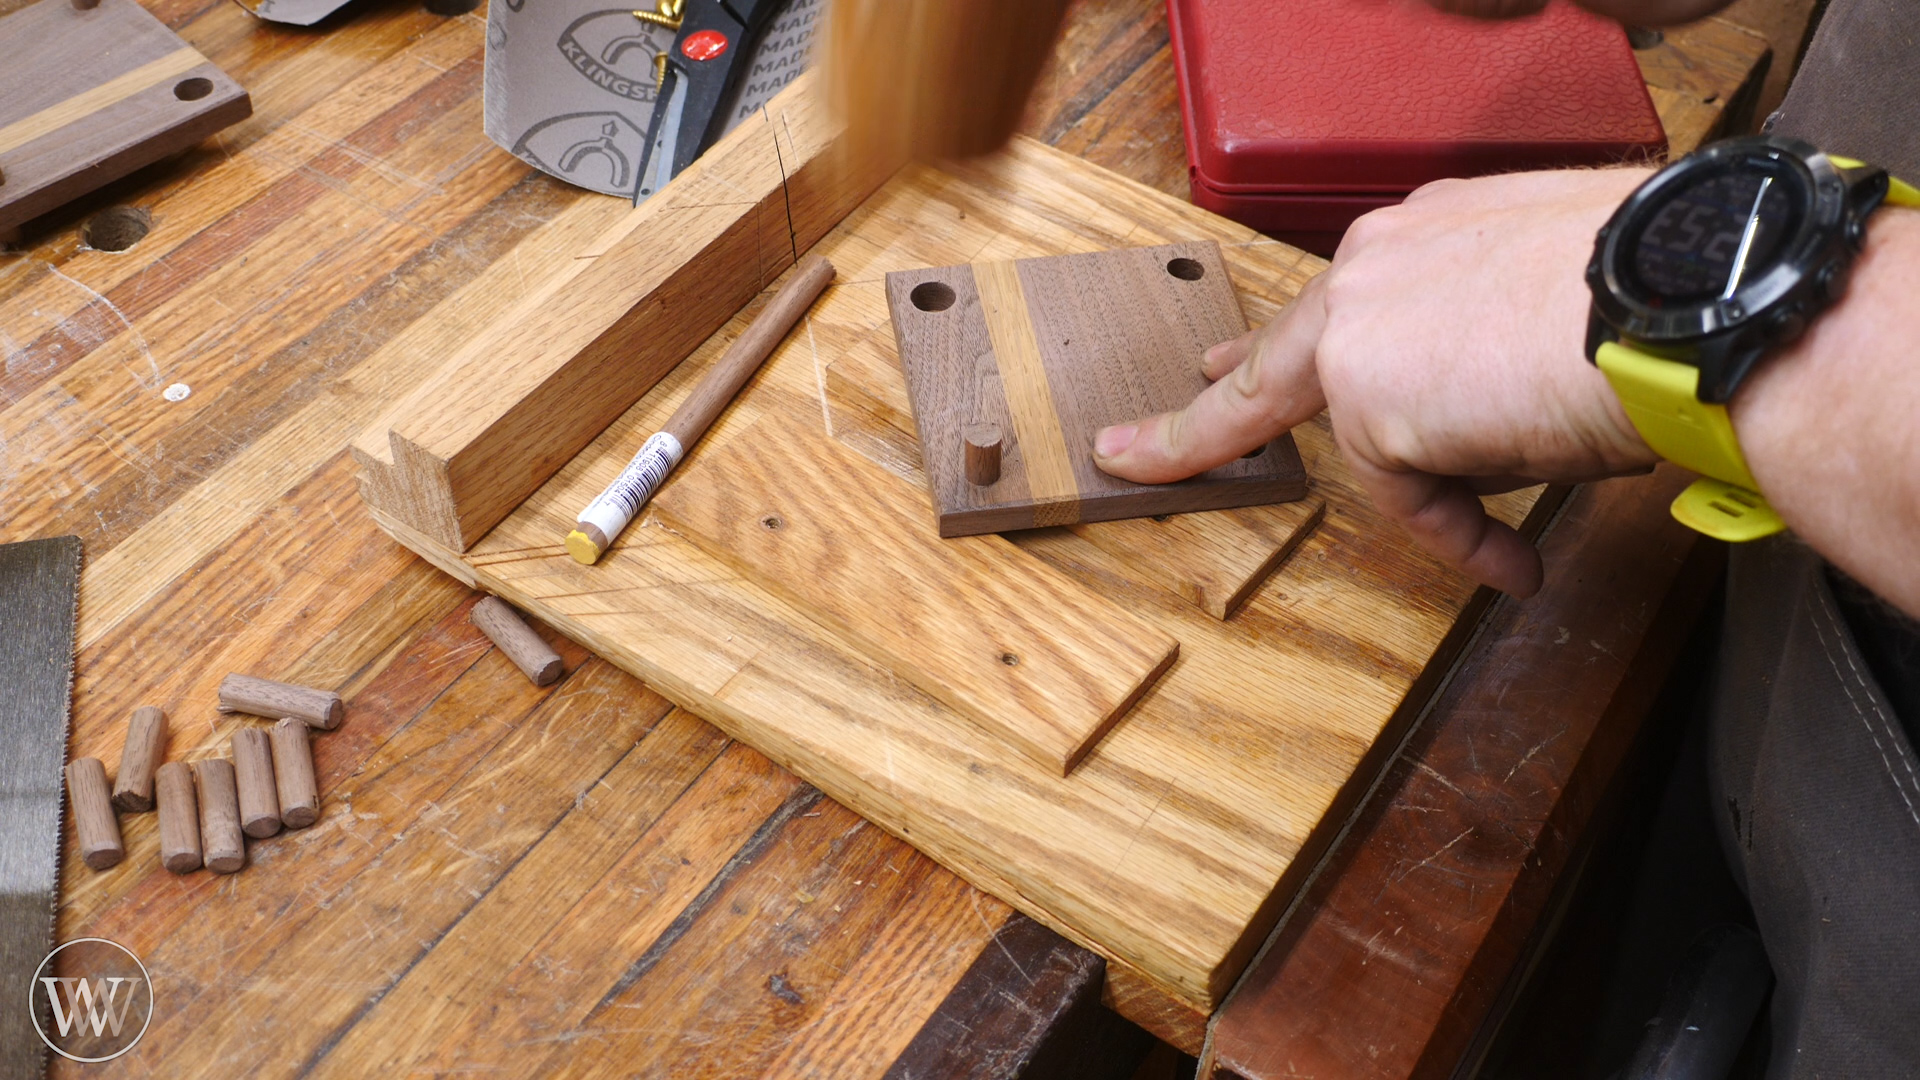
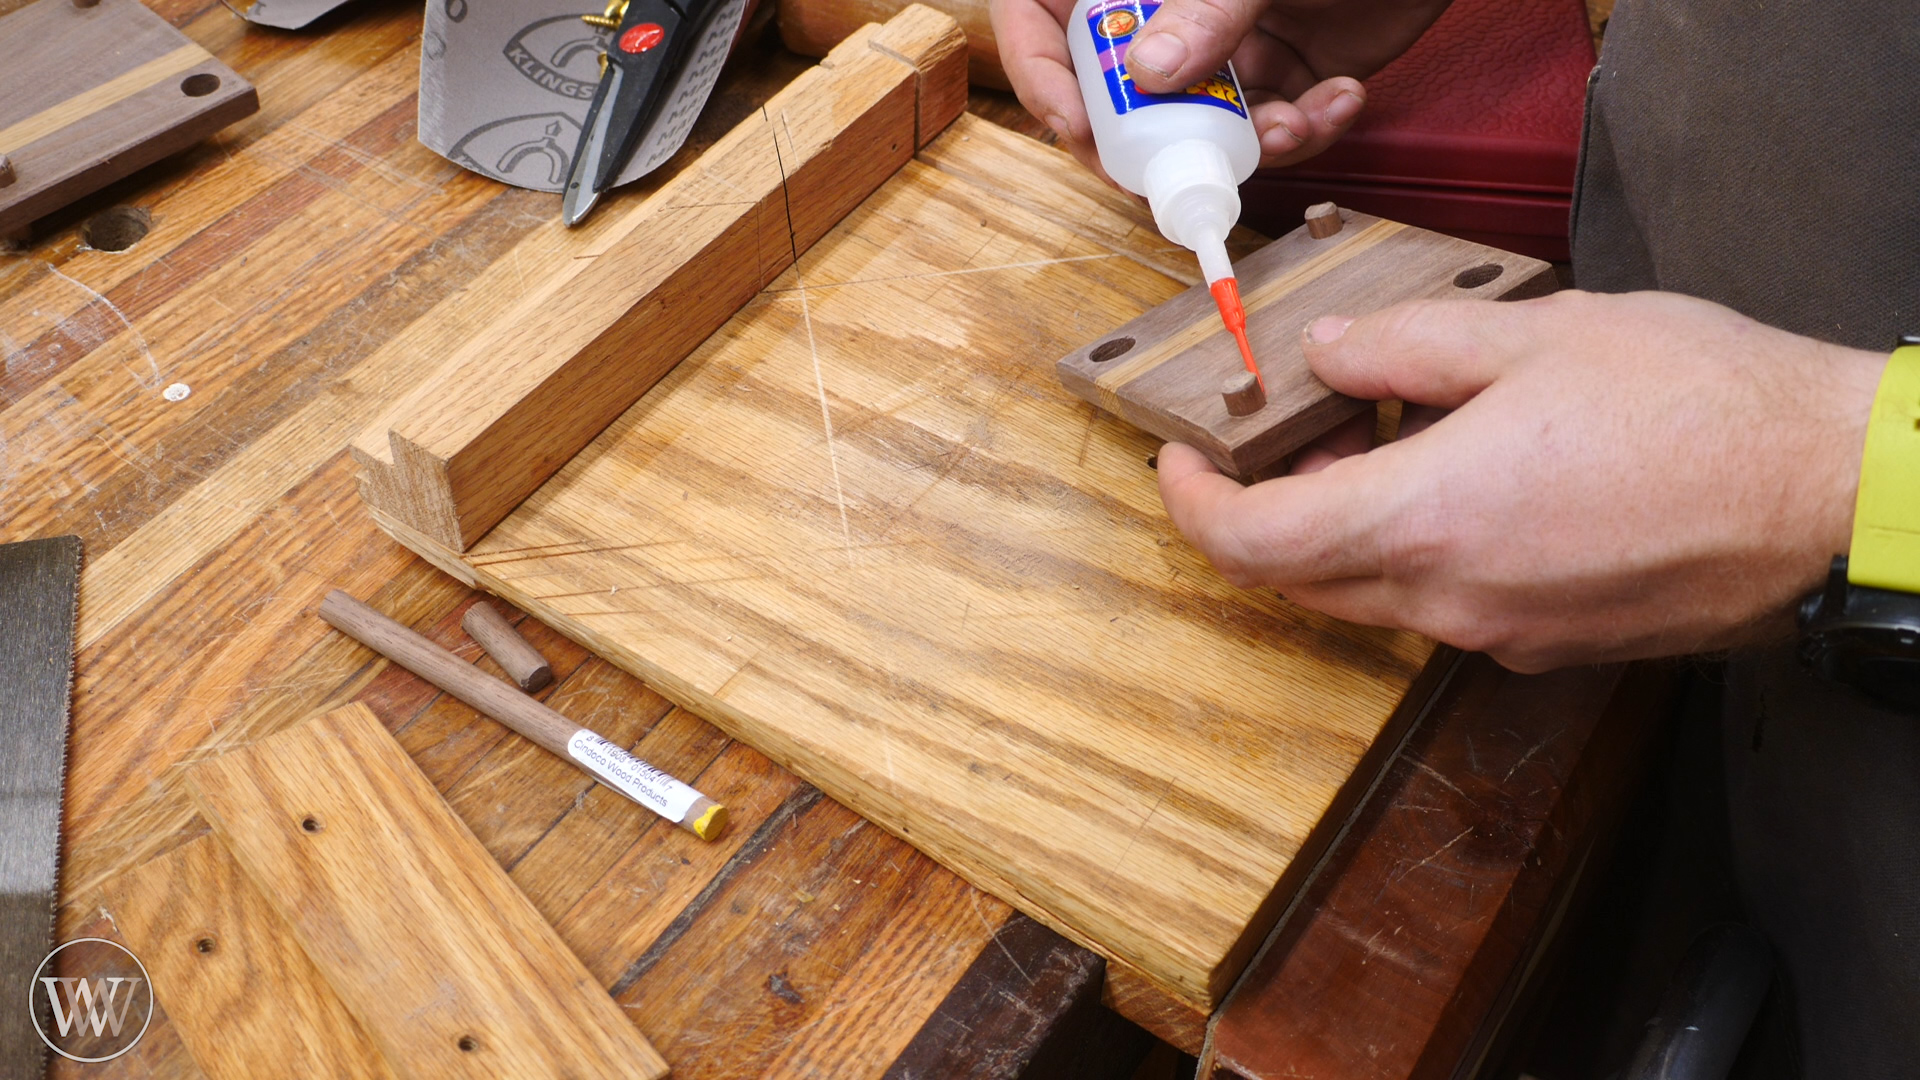
Next, we can stack up all six coasters and clamp them together so that they will not move. I used a 3/8 in auger bit to drill a hole all the way through all six coasters on two opposing corners. These holes will be what allows a dowel to go through. Then, with a half inch bit, I drilled a hole all the way through in the other two opposing corners. This will be the hole that allows the dowel to rest in when the coasters are stacked up. Next, we need to cut the 3/8 dowel into 12 sticks approximately 1 inch long. You can use a piece of sandpaper to clean up one end of each of these dowels.
Step 6. Attach pins
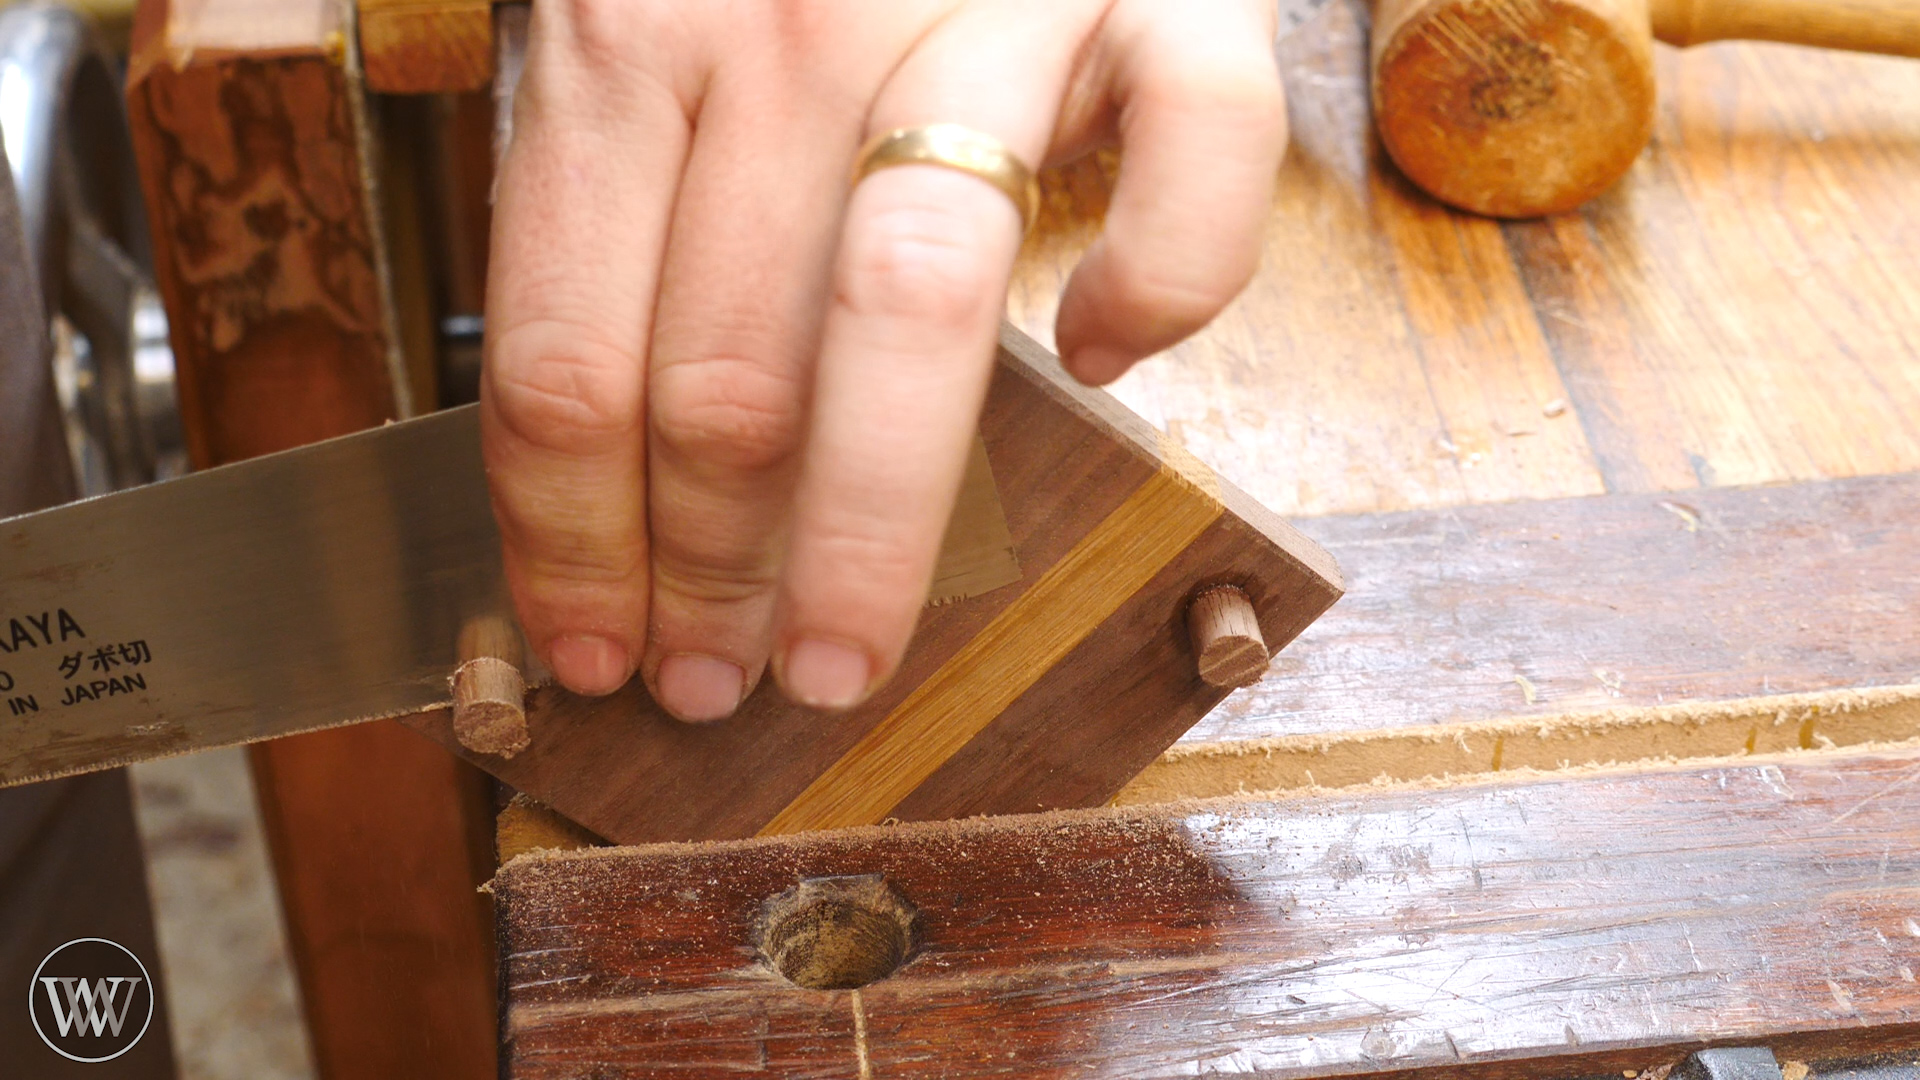
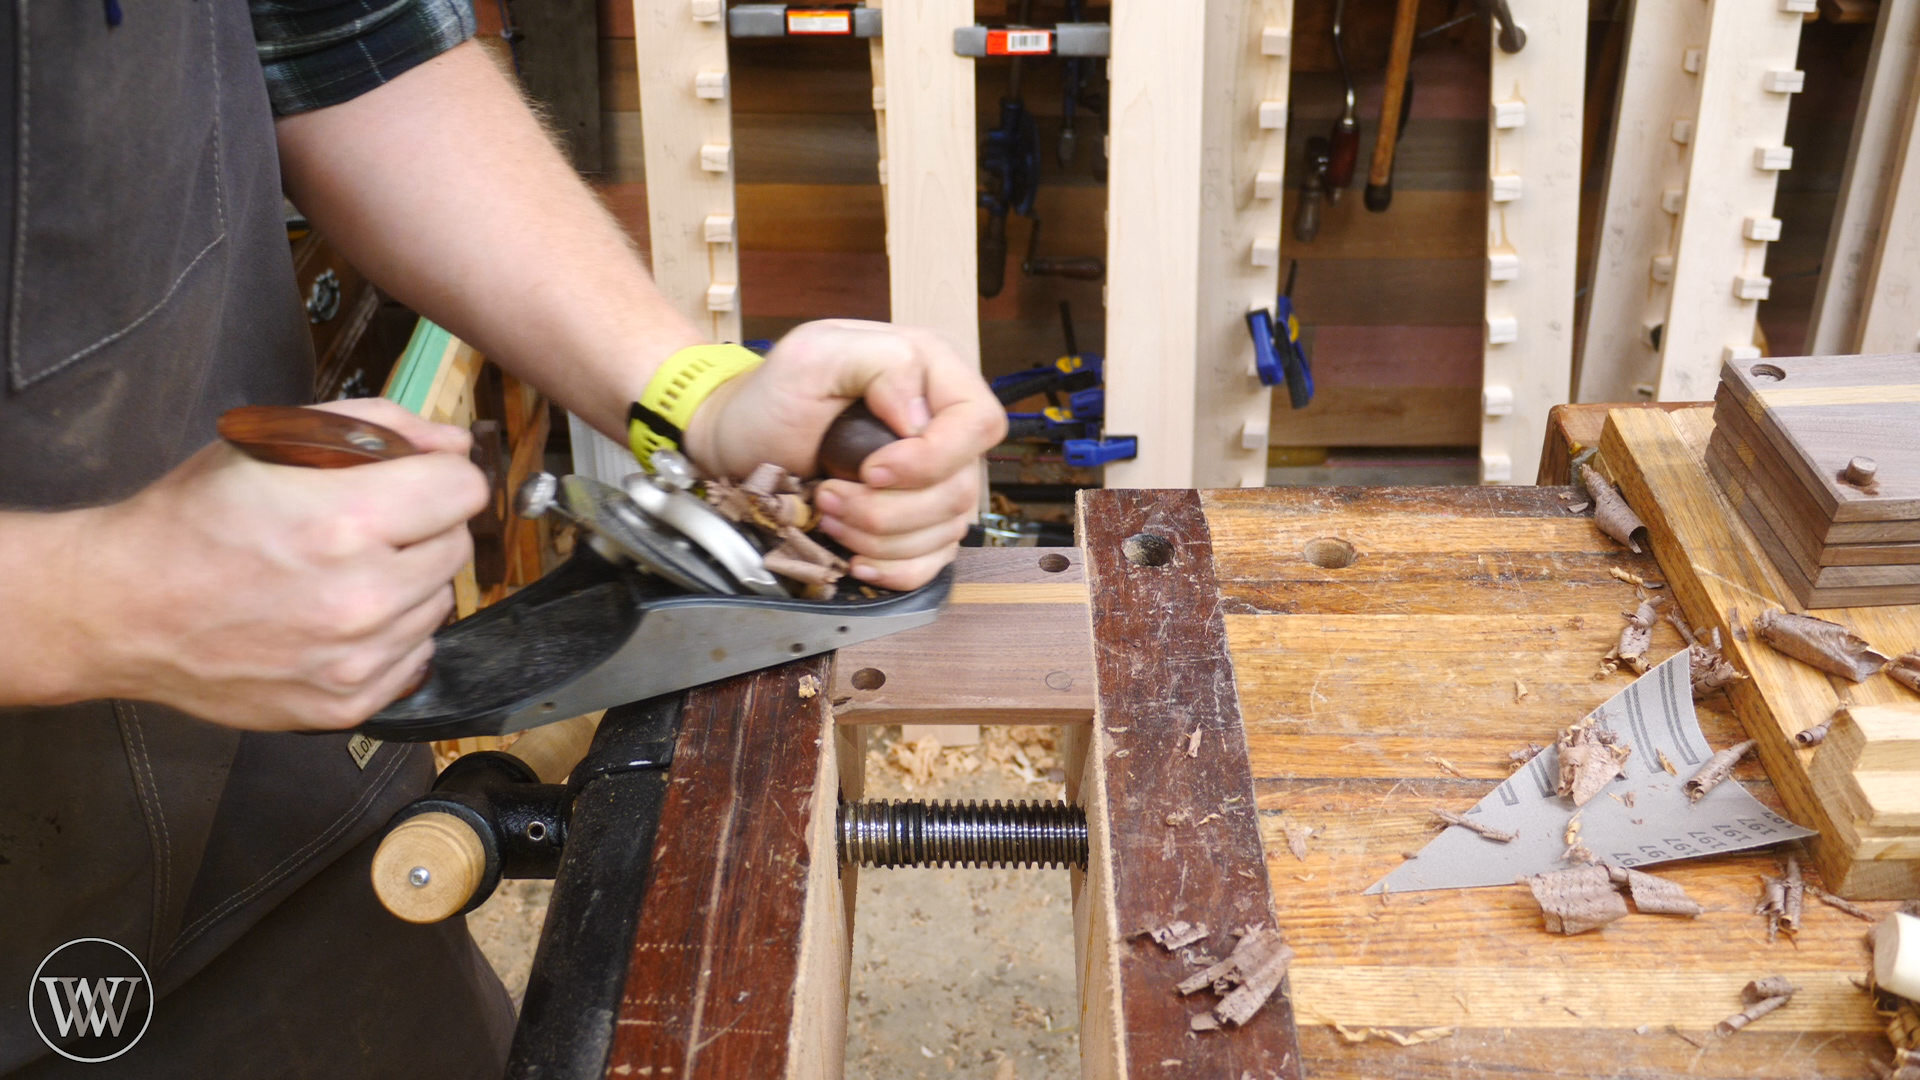
Next, I grab a couple scraps of wood that are thinner than 1/4 inch thick. These will act as spacers so I can drive the dowel through the hole and this will make sure all the dowels stick out the same amount from the face. With one dowel driven into each of the 3/8 holes you should have the smooth end of the dowel sticking out less than a quarter inch on the top side of the coaster and the excess of the dowel sticking out on the bottom. I used some thin 2P10 super glue to glue the pins in place. Once the glue has set, I can smooth off the bottom with a flush cut saw and a hand plane. Last we can go over the whole piece with a scrap of sandpaper and get it ready for finish.
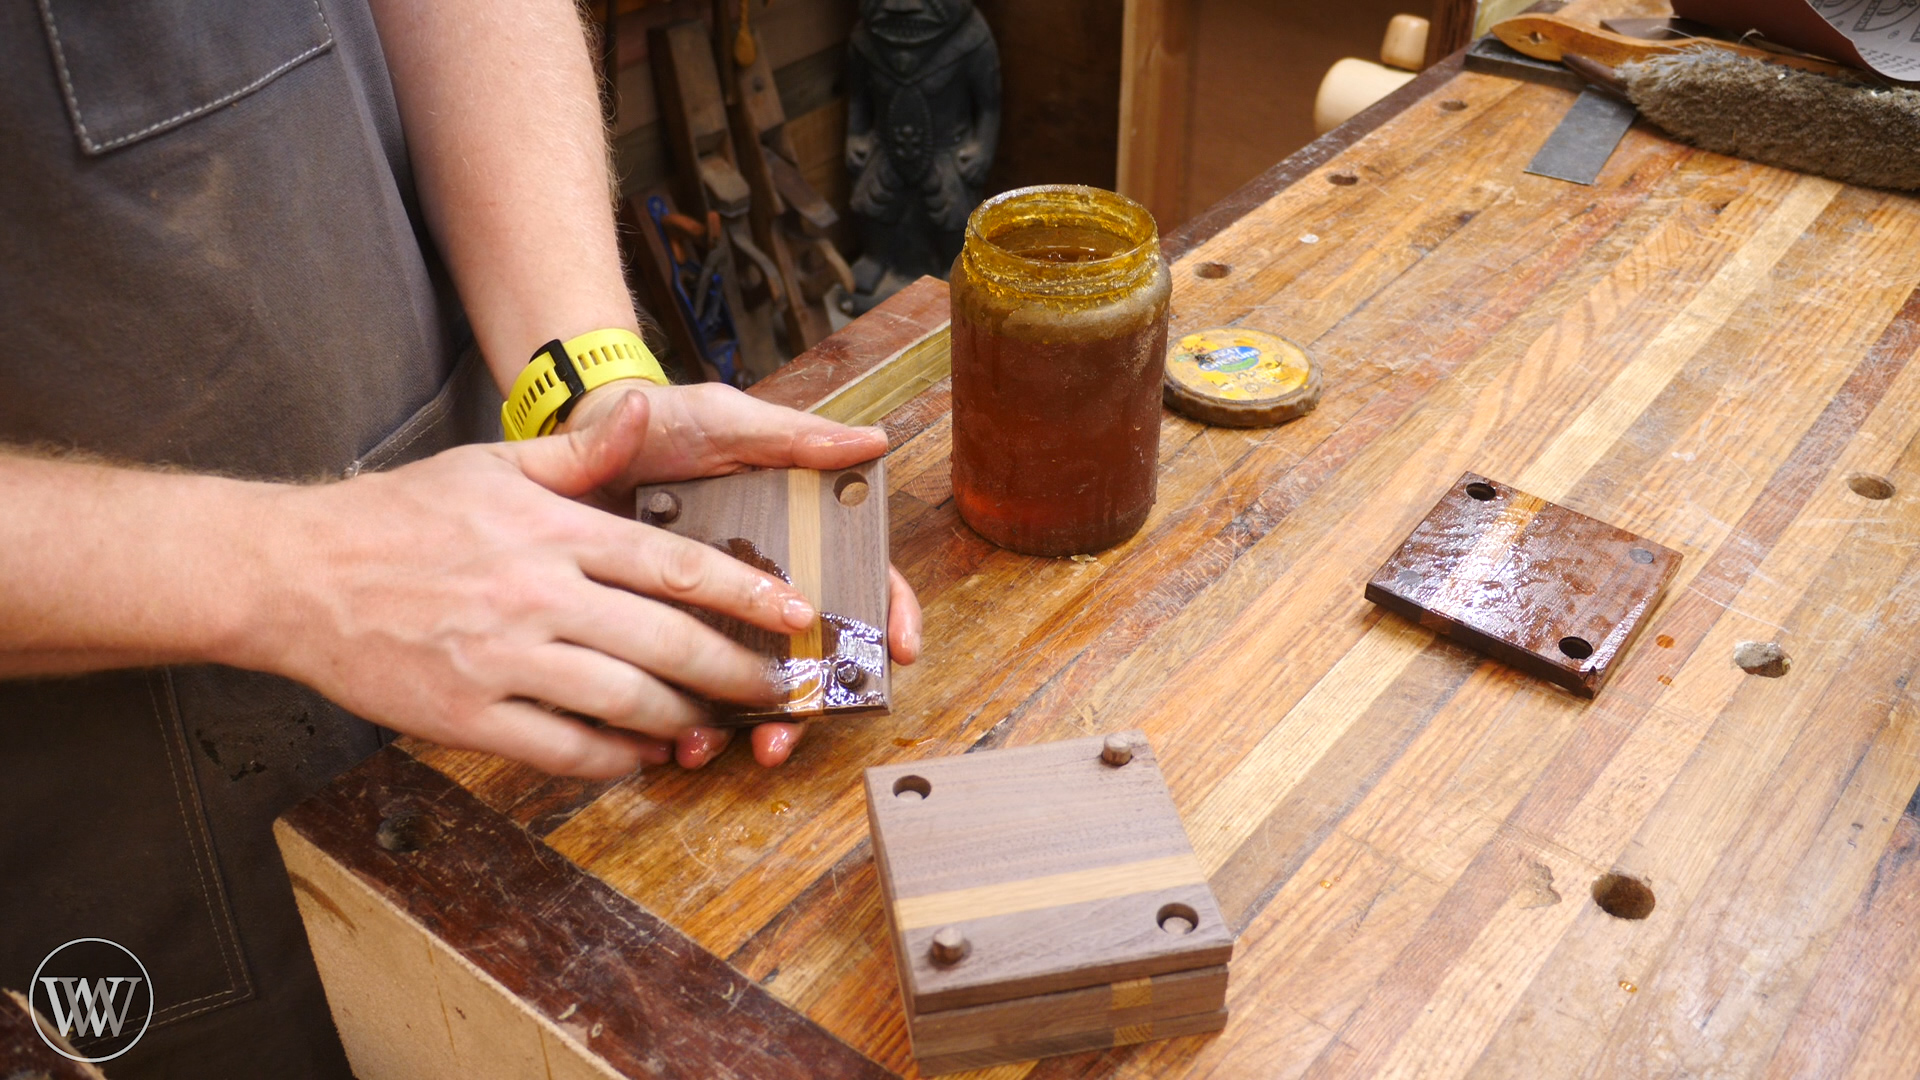
Step 7. Finish the coasters
I start with boiled linseed oil as this will bring out the color of the walnut by just applying a layer to all surfaces. Once it has sat for a few minutes, I will come in with a rag and wipe off the excess boiled linseed oil. I will let that dry for a couple of hours and then come back and apply six coats of wipe on poly. I will sand after the second coat and after the fourth coat with 400 grit sandpaper to leave them with a nice clean finish. Once the finish has dried, they're ready for use.