
The Simplest Way to Hand Cut Dovetails
Dovetails can be complex, but they do not need to be. This is the simplest and easiest way I know to hand cut a dovetail joint. As hand tool woodworking skills go, this one is very easy once you master a few basic skills. Also, there are thousands of ways to do it. This is just one method that does not require much thought or a pile of jigs.
Tools needed
Square: http://amzn.to/2ia9M3Z
Marking Knife: http://amzn.to/2hPHf34
Chisel Set: http://amzn.to/2i26mzX
Dovetail Saw: http://www.highlandwoodworking.com/veritas-dovetail-saw.aspx?A=1367&B=28
Moxon Vise: How I made mine: https://www.youtube.com/watch?v=Rl04h_lFKhc
Mallet: How I made mine: https://www.youtube.com/watch?v=CO4QtjMuN4Q
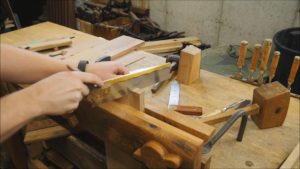
Mark the Depth

For the depth of the pins and tails, I like to use the actual thickness of the board rather than a marking gauge. This is far more exact, and it requires fewer tools. On top of that, there may be small differences from board to board. This will give you exact measurements to use. To make these marks, I set them on the back side of the Moxon vise and make the mark on both sides of the board. It is fairly quick to mark both sides of both boards and you are making a line that you can trust.
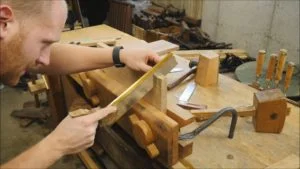
Mark out the Tails


I like to use a storyboard to transfer the marks to the end of the board. This way, I can make the same tails on all the boards. Then with a square, I transfer those marks across the top square to the face of the board. Make sure to cross or (x) out the segments that need to be removed. It is no fun to cut out the wrong pieces.
Cut Tails

I do not mark out the angle to cut the tails at. In all honesty, it really does not matter. I just put the saw on the cut line and lean it a bit until it looks good to me. A lot of people get all bent out of shape about the angle on the tails and it makes no difference in the world at this point as long as it looks good to you.
Remove Tail Waste


I start with a chisel set back about 1/16" or so from the depth line and make a quick down stroke along the line. Then, come in at about a 30-degree angle and pare back to the stop cut that was just made. Then, repeat the presses tell you are down about half way. Next, flip the board over and do the same thing from the other side until you break through. Lastly, I put the chisel right into the stop line and clean out the wood right back to the line under-cutting the joint slightly for a better fit.
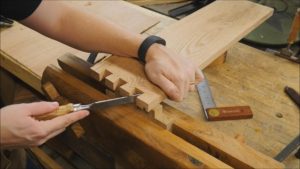
Mark the Pins

Set the pin board in the Moxon vise just slightly above the top of the vise and with a block the same height as the Moxon vise so you can set the tail board on top and line them up. While keeping pressure on the board, use a marking knife and transfer the marks to the end of the pin board. Again, make sure to cross or (X) out the segments that need to be removed.
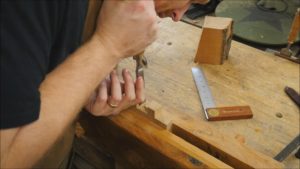
Cut the Pins
Sometimes I will use the square to put vertical lines down the face of the board to follow with the saw, but most of the time I just use the reflection in the saw to make sure it is square to the face. Next, it is time to just cut. Keeping the reflection flat to the work piece, I cut down to the depth cut line.
Remove Pin Waste
First, I will rotate the board in the vise 90-degrees and cut down the depth line to remove the chunks on the outside edge. Then, I chisel out the waste the same way I did with the tails.
Final Fitting

For most people, you are not going to get it to fit right off the saw the first time. Once you put the two boards together, you will see places where they are tight or overlapping. I use a chisel to slowly remove material until the fit is tight. Be sure to not remove material from any edge that will be a final show edge. You can remove material from either the pins or tails. Give it a try and see what it does. I will often remove material from both. This way you can maintain a tight show face. Remember less is more. This is the make or break step where the skill is developed. If you take off too much too fast you will have large gaps.
Fit the Joint


After going back and forth with the fitting process and testing the fit, you will eventually have a fit that works. It should require a bit of force to put together and be a bit of a struggle to take apart. Remember this is not a skill that can be developed overnight. The more you do it the better it will get.