
Making a Bird Feeder for Mother’s Day With the Kids
A bird feeder, what better present to make for Mother's Day with the kids. This is a simple project that can be made in an afternoon with the kids helping out and learning about different tools in the shop. With a very basic set of chisel, hand plane, drill and saw anyone can make a bird feeder. Not only will mom love something that the kids made, but the kids will have a good time in the shop and learn about tools. If this is something you want to make for your kids you can also pick up the plans for free here. https://www.woodbywright.com/shop/
Also, if you want more detail you can follow the entire build in the video here. https://youtu.be/raZp60ffwCU It's also worth watching the faces of the kids as they get to play with tools in daddy’s shop.
Supplies needed
Chain: https://amzn.to/2I6AtnE
Plexiglass: https://amzn.to/2IcasmQ
Eye Screws: https://amzn.to/2wB4eHS
Dowel: https://amzn.to/2Ichs3v
Cedar: 1” x 8” x 8’ from your local home center
Deks Olje D1: https://amzn.to/2jReEKt
Deks Olje D2: https://amzn.to/2KRR8Jk
Tools needed
#4 Hand plane: http://amzn.to/2hc6LQZ
Panel saw: http://amzn.to/2hjAura
Marking knife: http://amzn.to/2hPHf34
Brace: http://amzn.to/2hPEs9Y
Drill Bit Set: http://amzn.to/2kwmFFZ
Chisel Set: http://amzn.to/2i26mzX
Step#1 Cut the lumber to length

This is a fun time to introduce the kids to a hand saw. Some kids will pick up a saw and go to town without much of any instruction at all, some kids want you to help them guide, and some kids just want their hand on the saw while you run it. For most of the cross-cuts, I find it easiest to put it in a vice on a bench and let the kids cut down the line you drew. Two boards will need to be ripped cut and that is easiest to do at a saw bench or even an old shop chair. It's a good opportunity to teach the kids about sawing a different orientation. On top of that, you will learn how to saw better because you'll have to hold it in an odd way to get around the kids. After the boards have been cut, they can all be smoothed out and remove all of the saw marks. This is a great opportunity to teach the kids about hand planes and how they work very easily on cedar.
Step#2 Attaching the sides to the bottom

For all the joinery in this build you will be using dowels. These are fairly strong and are extremely easy to install. You just have to drill a hole and then insert a dowel with glue and you're done. For attaching the sides to the bottom, I will use three dowels along the bottom edge. The kids can use the brace to drive in the bit and then have the fun of pounding a dowel down into the side with a little bit of 5-minute epoxy. You can then flush cut off the dowel and smooth it off with a plane once the glue has dried.
Step#3 Cutting the grooves for the glass

It is easiest to cut the grooves with a grooving plane before installing the sides to the bottom as we did in the last step. However in the video, I missed that and found it would be a good opportunity to teach the kids how to cut the grooves without using a plow plane as most people do not have one. Though cutting a groove with a chisel may seem scary, it can be easily done. Start by marking out where the grooves need to go. They are 1/4 inch wide and 1/4 inch deep and 1 and 1/2 in in from the outside. Use a chisel to cut the stop cut at the end of the groove and then use a larger chisel to start cutting in the sides of the groove. Once the sides have been cut a little bit deeper, you can come in with a quarter inch chisel and remove the waste in between those cut marks that you made. Repeat the process cutting down a little bit deeper on the sides and a little bit deeper on the end until the groove is down to the depth of 1/4 inch.
Step#4 Attaching the rails to the front and back

The rails are attached to the front and the back almost the exact same way as the sides are connected to the bottom. I used 1 dowel at either end through the rail into the side panels and then 4 through the rail into the bottom panel for a total of 5 pins per side. Using a bit of 5-minute epoxy at each of the dowel joints.
Step#5 Finishing the wood

I chose to finish the wood before going on and installing the hardware and plexiglass. On my last bird feeder, I used boiled linseed oil and paste wax because it was quick and easy and the kids could enjoy the fun of putting it on with their hands and not worry about chemicals. But in this case, I wanted the bird feeder to last a lot longer I used a marine varnish. I chose Deks Olje as it is a very high-quality long-lasting system that will keep the wood looking good for years and years to come. I started by using D1 which soaks into the wood and leaves a matte finish. This will help keep the wood itself from rotting as it soaks deep down into the surface. Next, I used a D2, apply four to six layers on top. This is a film surface furnish that will protect the wood from scratches and dents over the years.
Step#6 Installing the plexiglass

I purchased the plexiglass in a 2ft x 3ft sheet of quarter inch thick. This meant that I have to cut it down to the exact measurements of my bird feeder. The measurements on mine were 21 and a half inch by 6 and 1/2 in tall. But I would suggest measuring the grooves on yours so that you can get it to fit. Cutting plexiglass is fairly easy. You can just score it with a knife making sure to score on both sides deeply and then snap it off on the edge of the bench. If there are any jagged edges left over they can be trimmed up with a plane.
Step#7 Attaching the hardware
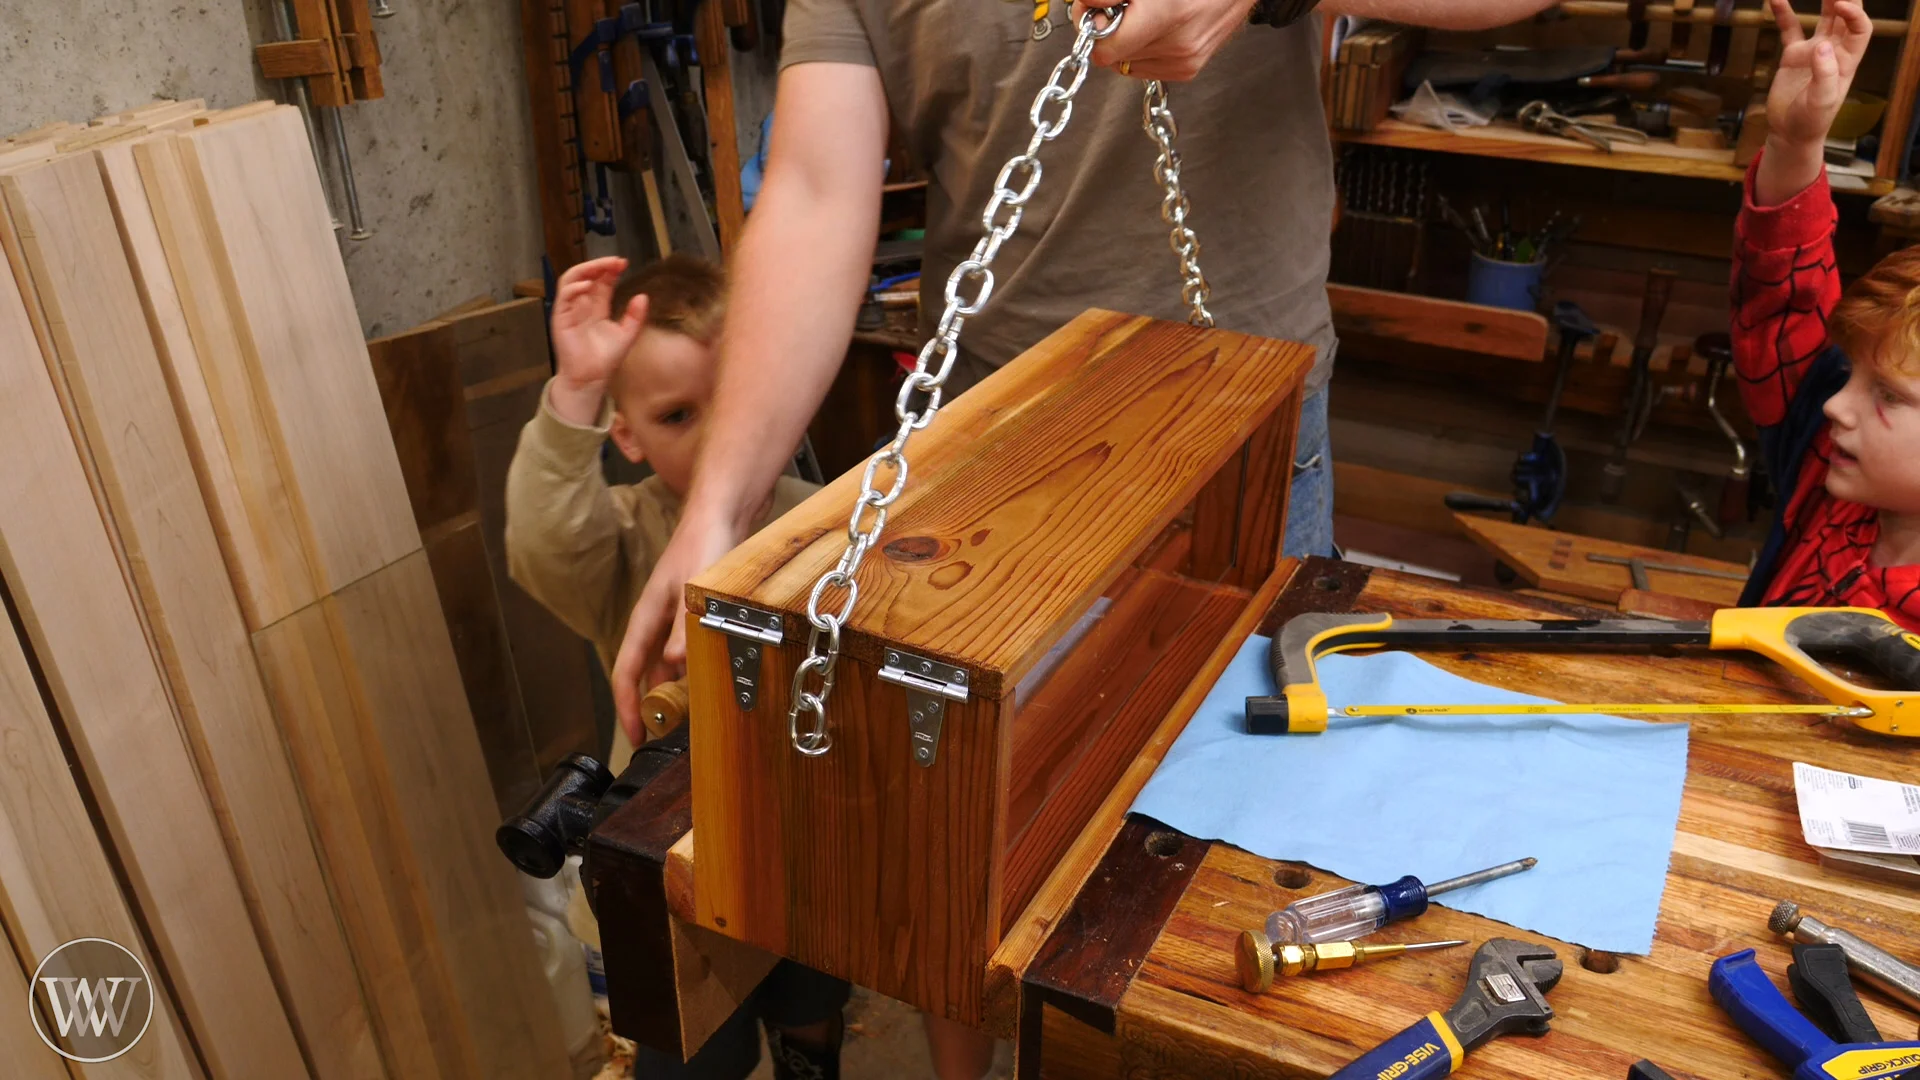
For the hardware, I chose a pair of hinges to go on the end allowing the lid to lift up. Then I chose a heavyweight chain that is probably far more than I need but still functional and I like the thick beefy look of it. The chain is attached to either side with eye screws. I decided to choose eye screws that were stainless steel so that they would stand up much better being in direct contact with the wood. After that, the bird house is basically done and ready to give to Mom.
Step#8 Giving it to Mom
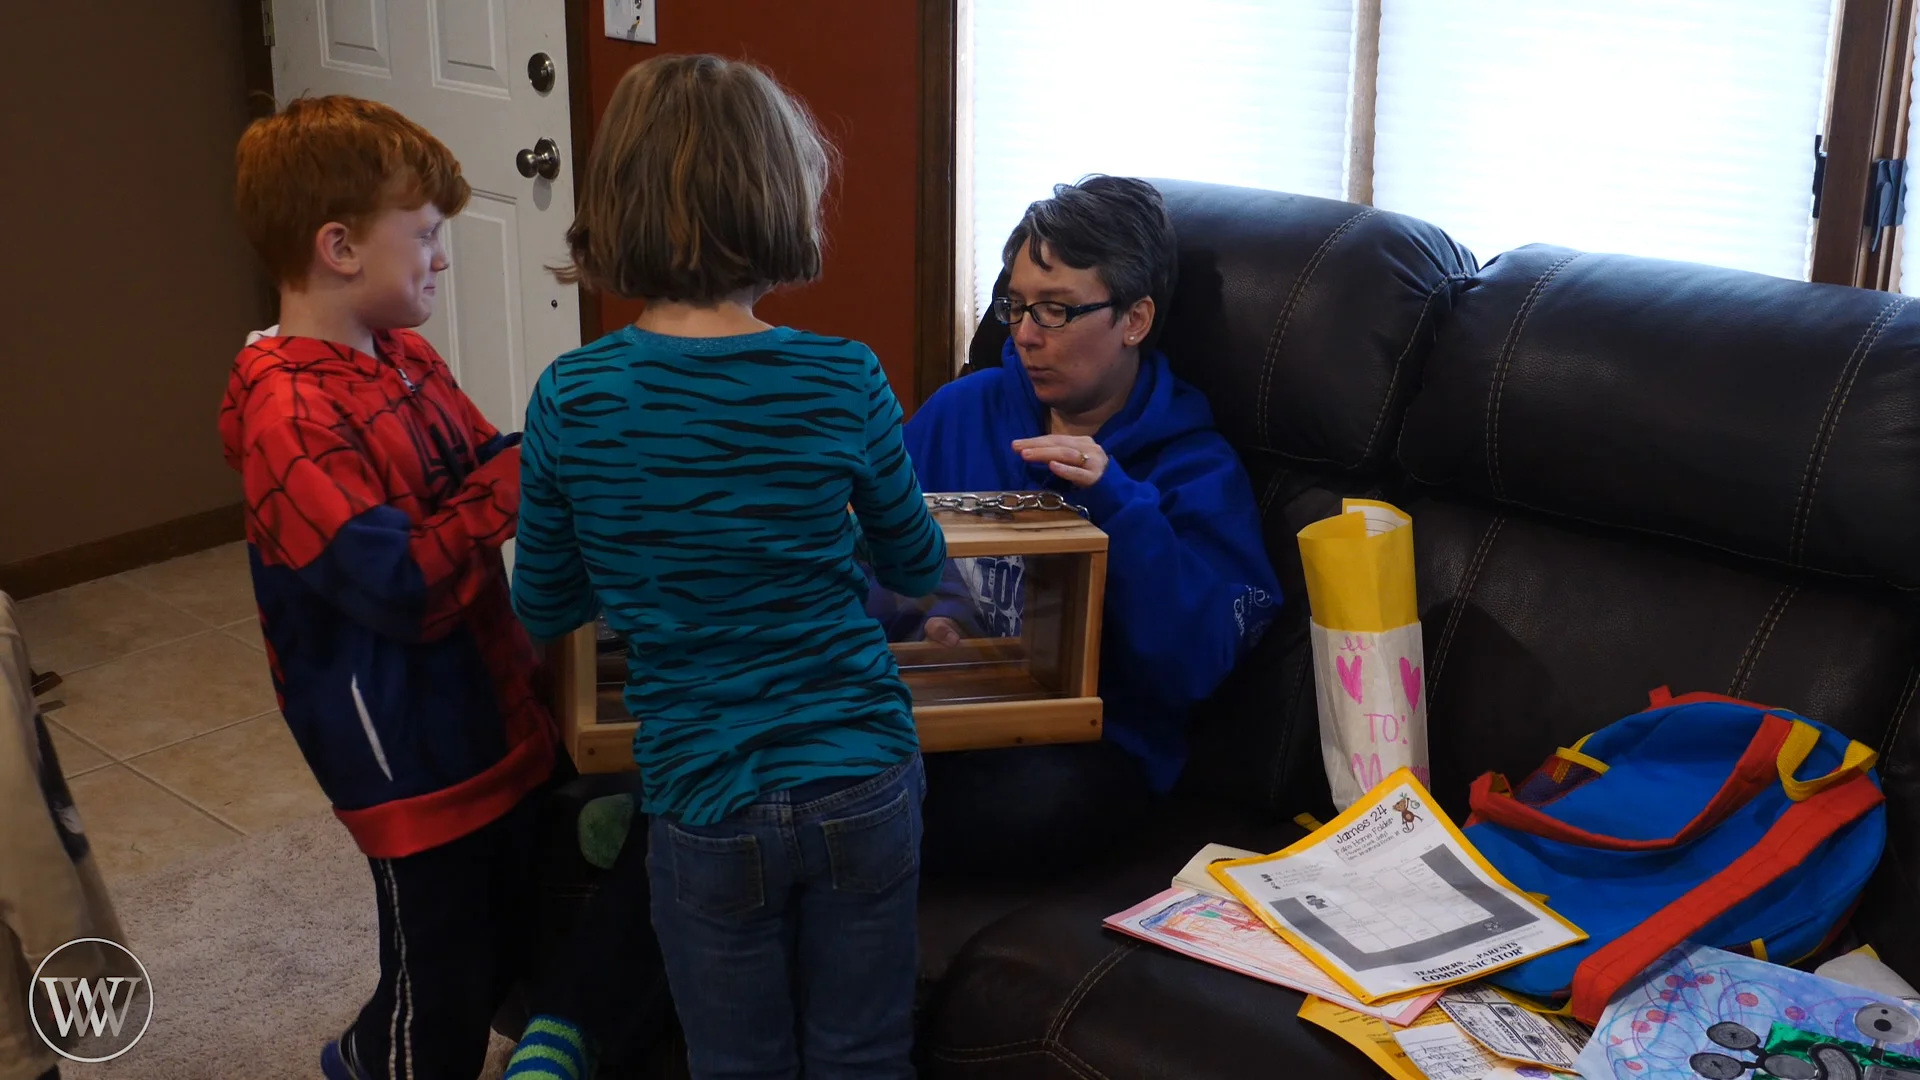
This is probably the most fun step where you get to see the kids eyes light up as they give a gift to Mom. Mom may even like it too, but the real fun in this project is the time in the shop with the kids getting the chance to teach them tools. Letting them learn the fun of working in the shop and making something with their own hands is invaluable. Whether or not the birds actually eat any food out of the bird feeder, the memories have been made and will last for a lifetime.